1. Faatonuga Saogalemu
Fa'amolemole faitau ma le fa'aeteete fa'atonuga uma a'o le'i fa'aogaina le masini. Taofi lenei tusi lesona mo nisi fa'amatalaga i le lumana'i.
- Ia mautinoa le sapalai eletise voltage fetaui ma le fa'ailoga fa'ailoga i luga o le masini.
- Aua le faatofuina le iunite autu i le vai po o isi vai.
- Aveese le masini mai le paoa a'o le'i fa'amamā pe tausia.
- Keep hands and foreign objects away from moving parts during operation.
- Do not operate the appliance with a damaged cord or plug. Contact qualified service personnel for repairs.
- O lenei masini e le'o fa'amoemoe e fa'aoga e tagata e fa'aitiitia le malosi o le tino, lagona, po'o le mafaufau, po'o le leai o se poto masani ma le malamalama, se'i vagana ua tu'uina atu ia i latou le vaavaaiga po'o le fa'atonuga e uiga i le fa'aogaina o le masini e se tagata e nafa ma lo latou saogalemu.
- Allow the unit to stand upright for at least 24 hours after transportation before plugging it in to allow the refrigerant to settle.
2. Oloa Ua Ovaview
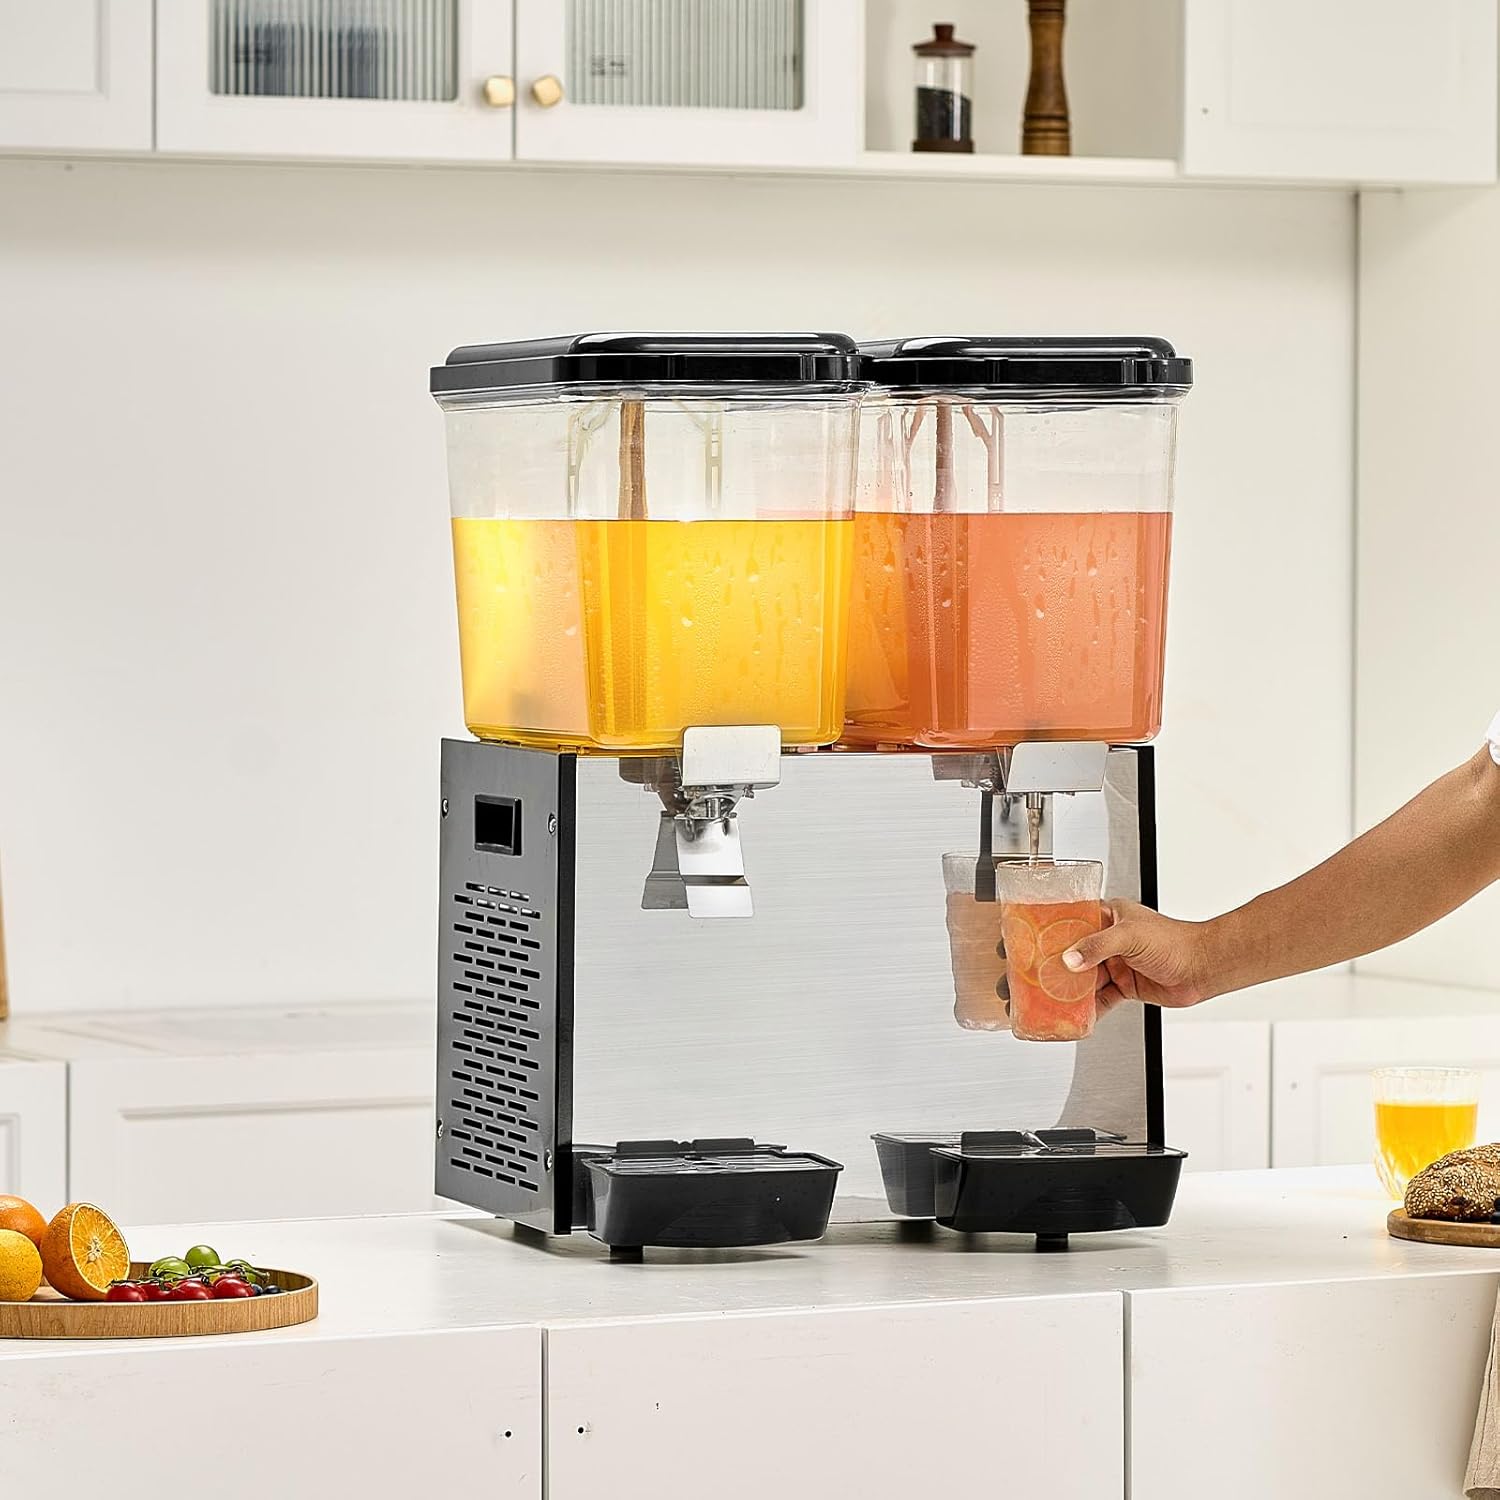
The VEVOR Commercial Beverage Dispenser Model LYJ18LX2 is designed for efficient cooling and dispensing of various cold beverages. It features two 18-liter tanks, a stainless steel body, and a powerful cooling system to maintain beverages at 45-54°F (7-12°C). The unit includes stirring rods to prevent sedimentation and ensure uniform temperature.


3. Fa'amatalaga
| Fa'aaliga | Fa'amatalaga |
|---|---|
| Numera Fa'ata'ita'i | LYJ18LX2 |
| Fa'ailoga | VEVOR |
| Mea | Polycarbonate (PC), Uamea u'amea |
| Lanu | Lanu uliuli |
| Malosiaga | 2 x 18 Liters (19 QT per tank) |
| Malosiaga | 370W ± 10% |
| Va'aiga o le Maalili | 45-54°F (7-12°C) |
| Fua o Mea (L x W x H) | 18.3 x 17.9 x 26.4 inisi (465 x 455 x 670 mm) |
| Mea mamafa | 60.8 pauna (27.6 kilokalama) |
| Saogalemu le fufulu ipu | Yes (for removable parts) |
| UPC | 197988417798 |
4. Mea i totonu o le afifi
A uma ona tatala le afifi, fa'amolemole ia mautinoa o lo'o iai mea uma ma e le'i fa'aleagaina:
- 1 x VEVOR Commercial Beverage Dispenser Main Unit
- 2 x 18L PC Beverage Tanks
- 2 x Stirring Rods
- 2 x Lids
- 2 x Drip Trays (Water Catchment Boxes)
- 2 x Tank Seal Rings
- 4 x O-Ring Seals
- 1 x Tusi Fa'atonuga

5. Seti ma Fa'apipi'i
Follow these steps to set up your beverage dispenser:
- Tatalaina: Aveese ma le faaeteete vaega uma mai le afifiina.
- Tulaga Muamua: Place the main unit on a stable, level surface. Ensure there is adequate ventilation around the unit.
- Refrigerant Settling: After transportation, allow the unit to stand upright for at least 24 hours before plugging it into a power outlet. This allows the refrigerant to settle, preventing potential damage to the compressor.
- Install Stirring Rods: Insert the stirring rods into the center of each PC tank.
- Install Handles/Spouts: Attach the dispensing handles to the tanks. Ensure the pin of the handle is correctly aligned and secured.
- Place Drip Trays: Position the drip trays (water catchment boxes) directly below each dispensing spout on the main unit.
- Tank Placement: Carefully place the assembled PC tanks onto the main unit, ensuring they are securely seated.
- So'oga Malosi: Once all components are assembled and the 24-hour settling period has passed, plug the power cord into a grounded electrical outlet.

6. Fa'atonuga o Galuega
- Filling the Tanks: Open the lid of each PC tank. Pour your desired cold beverage into the tanks. Do not overfill past the maximum fill line.
- Ufiufi Saogalemu: Tapuni lelei le tapuni i luga o tane.
- Fa'agaoioi le mālūlū: Locate the power switches on the side or back of the unit. Turn on the cooling switch. The unit will begin to cool the beverages to the optimal temperature range of 45-54°F (7-12°C).
- Activate Stirring: If your beverage requires continuous mixing (e.g., juice with pulp), turn on the stirring switch. The stirring rods will rotate to ensure uniform temperature and prevent sedimentation.
- Dispensing Beverages: To dispense a beverage, place a cup under the dispensing spout. Press the stainless steel press switch to release the beverage. Release the switch to stop dispensing.
- Mata'ituina: Periodically check beverage levels and refill as needed.
7. Fa'amamā ma Tausiga
Regular cleaning and maintenance are essential for hygiene and extending the lifespan of your dispenser.
- Tapē le eletise: Aveese i taimi uma le iunite mai le paoa a'o le'i faamamaina.
- Tane gaogao: Drain any remaining beverages from the tanks.
- La'ese: Remove the lids, PC tanks, stirring rods, and drip trays.
- Fufulu Vaega Aveesea: The PC tanks, lids, stirring rods, and drip trays are dishwasher safe. Alternatively, wash them by hand with warm, soapy water and a soft brush. Rinse thoroughly and allow to air dry completely.
- Clean Spouts: Clean the dispensing spouts thoroughly to prevent residue buildup. Use a small brush if necessary.
- Mama Vaega Autu: Soloia le pito i fafo o le iunite autu ma faʻasalalaugaamp ie. Aua ne'i fa'aogaina ni mea fa'amama fa'amama pe fa'atofu le vaega autu ile vai.
- Lubricate Seals: Apply a small amount of food-grade Vaseline to the rubber sealing rings (tank seal rings and O-rings) periodically to maintain their flexibility and prevent leaks.
- Toe fa'aopoopo: Once all parts are clean and dry, reassemble the unit. Ensure all seals and components are correctly in place.
8. Faʻafitauli
If you encounter issues with your beverage dispenser, refer to the following common problems and solutions:
- Vaega e le mālūlūina:
- Ensure the power cord is securely plugged in.
- Check if the cooling switch is turned on.
- Verify that the unit has been allowed to settle for 24 hours after transportation before initial use.
- Ensure adequate ventilation around the unit. - Beverage Not Dispensing:
- Check if the tank contains enough beverage.
- Ensure the dispensing handle is fully pressed.
- Inspect the spout for any blockages. - Leaking from Tank/Spout:
- Ensure the tank is correctly seated on the main unit.
- Check if the rubber sealing rings are properly installed and not damaged. Replace if necessary.
- Ensure the dispensing handle is fully closed after use. - Stirring Rod Not Rotating:
- Check if the stirring switch is turned on.
- Ensure the stirring rod is correctly installed and not obstructed.
Mo mataupu e le o aofia ai iinei, fa'amolemole fa'afeso'ota'i le lagolago a le tagata fa'atau VEVOR.
9. Fa'amaonia ma Lagolago
VEVOR products are designed for durability and performance. For warranty information, product support, or to order replacement parts, please refer to the warranty card included with your purchase or visit the official VEVOR website. When contacting support, please have your model number (LYJ18LX2) and purchase date available.


