Folasaga
Thank you for choosing the Sharp Big Bang Alarm Clock. This manual provides detailed instructions to help you set up, operate, and maintain your new alarm clock. Please read this manual thoroughly before use and retain it for future reference.
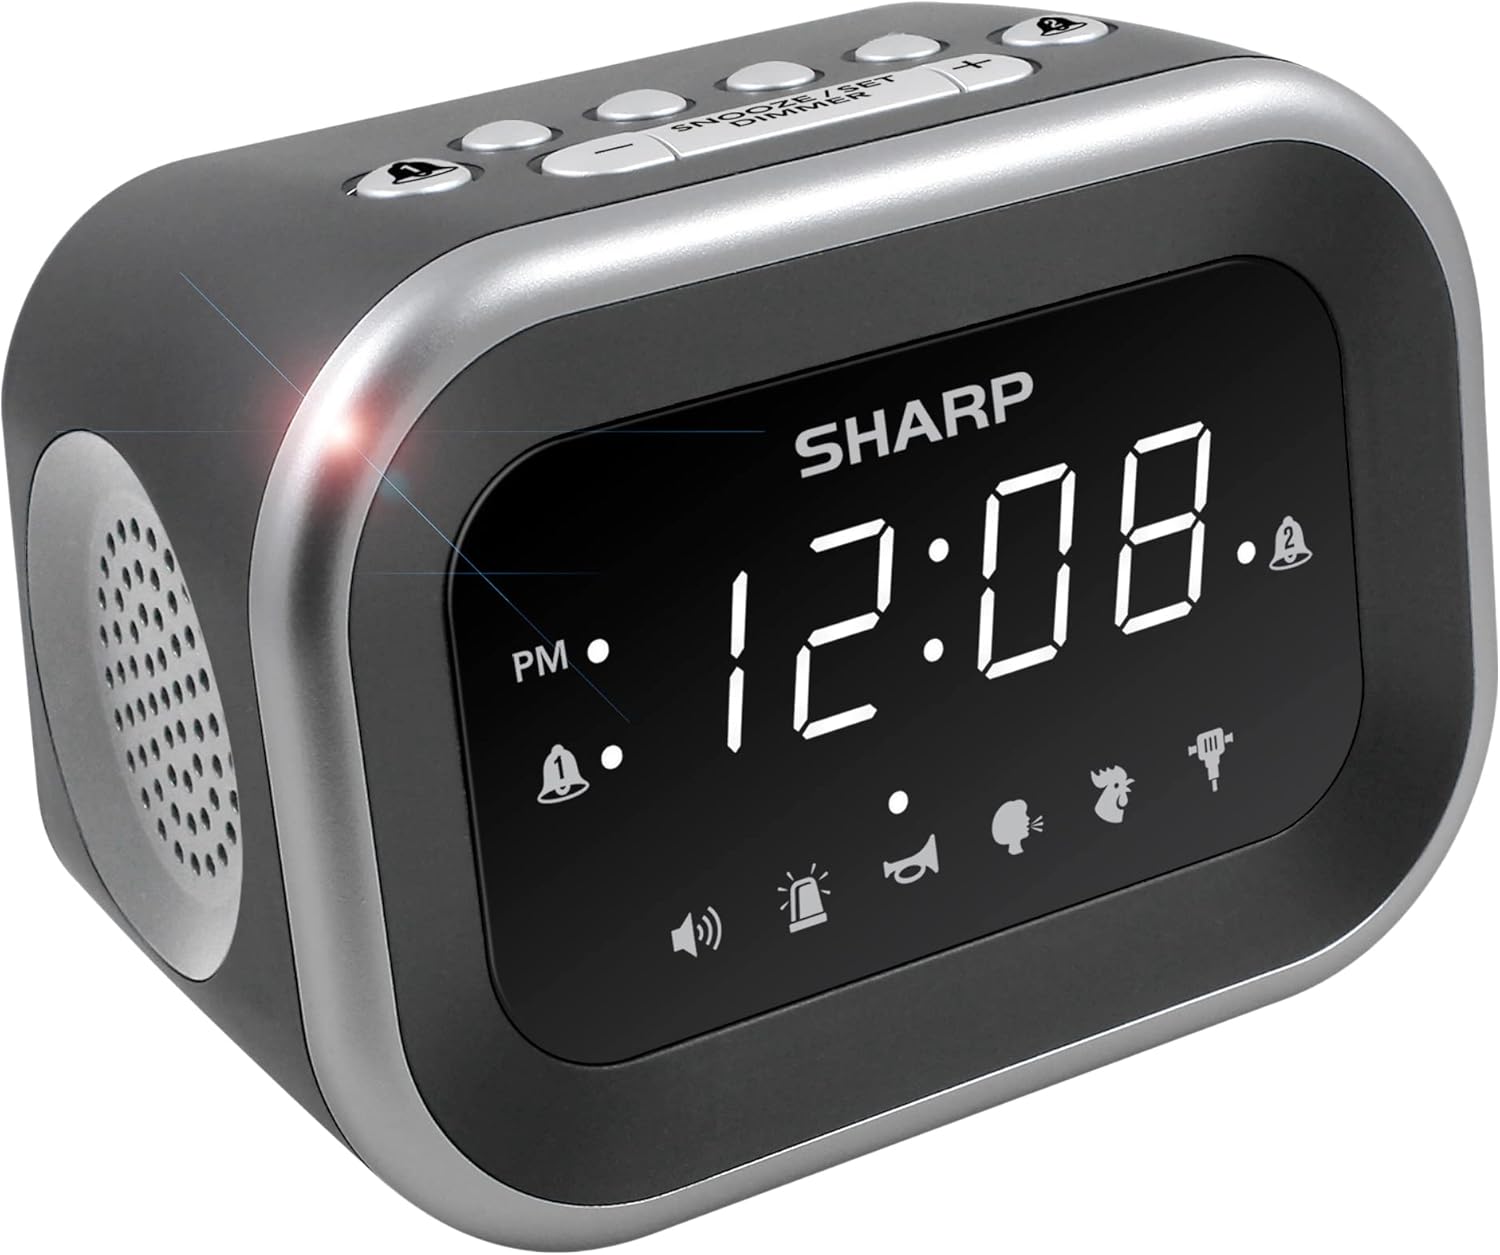
Ata: Luma view of the Sharp Big Bang Alarm Clock, showing the digital display and speaker grille.
Fa'amatalaga Saogalemu
- Do not expose the unit to extreme temperatures, direct sunlight, or high humidity.
- Taofi le masini mamao mai le vai po'o isi mea fa'asuavai.
- Use only the specified power adapter.
- Aua le taumafai e fa'a'ese'ese pe sui le iunite.
- Taofi ese mai tamaiti.
O mea o lo'o i totonu
- Sharp Big Bang Alarm Clock
- Adaptor Mana Mana
- Tusi Lesona a le Tagata (lenei pepa)
Ua Umaview
Familiarize yourself with the various components and controls of your alarm clock.
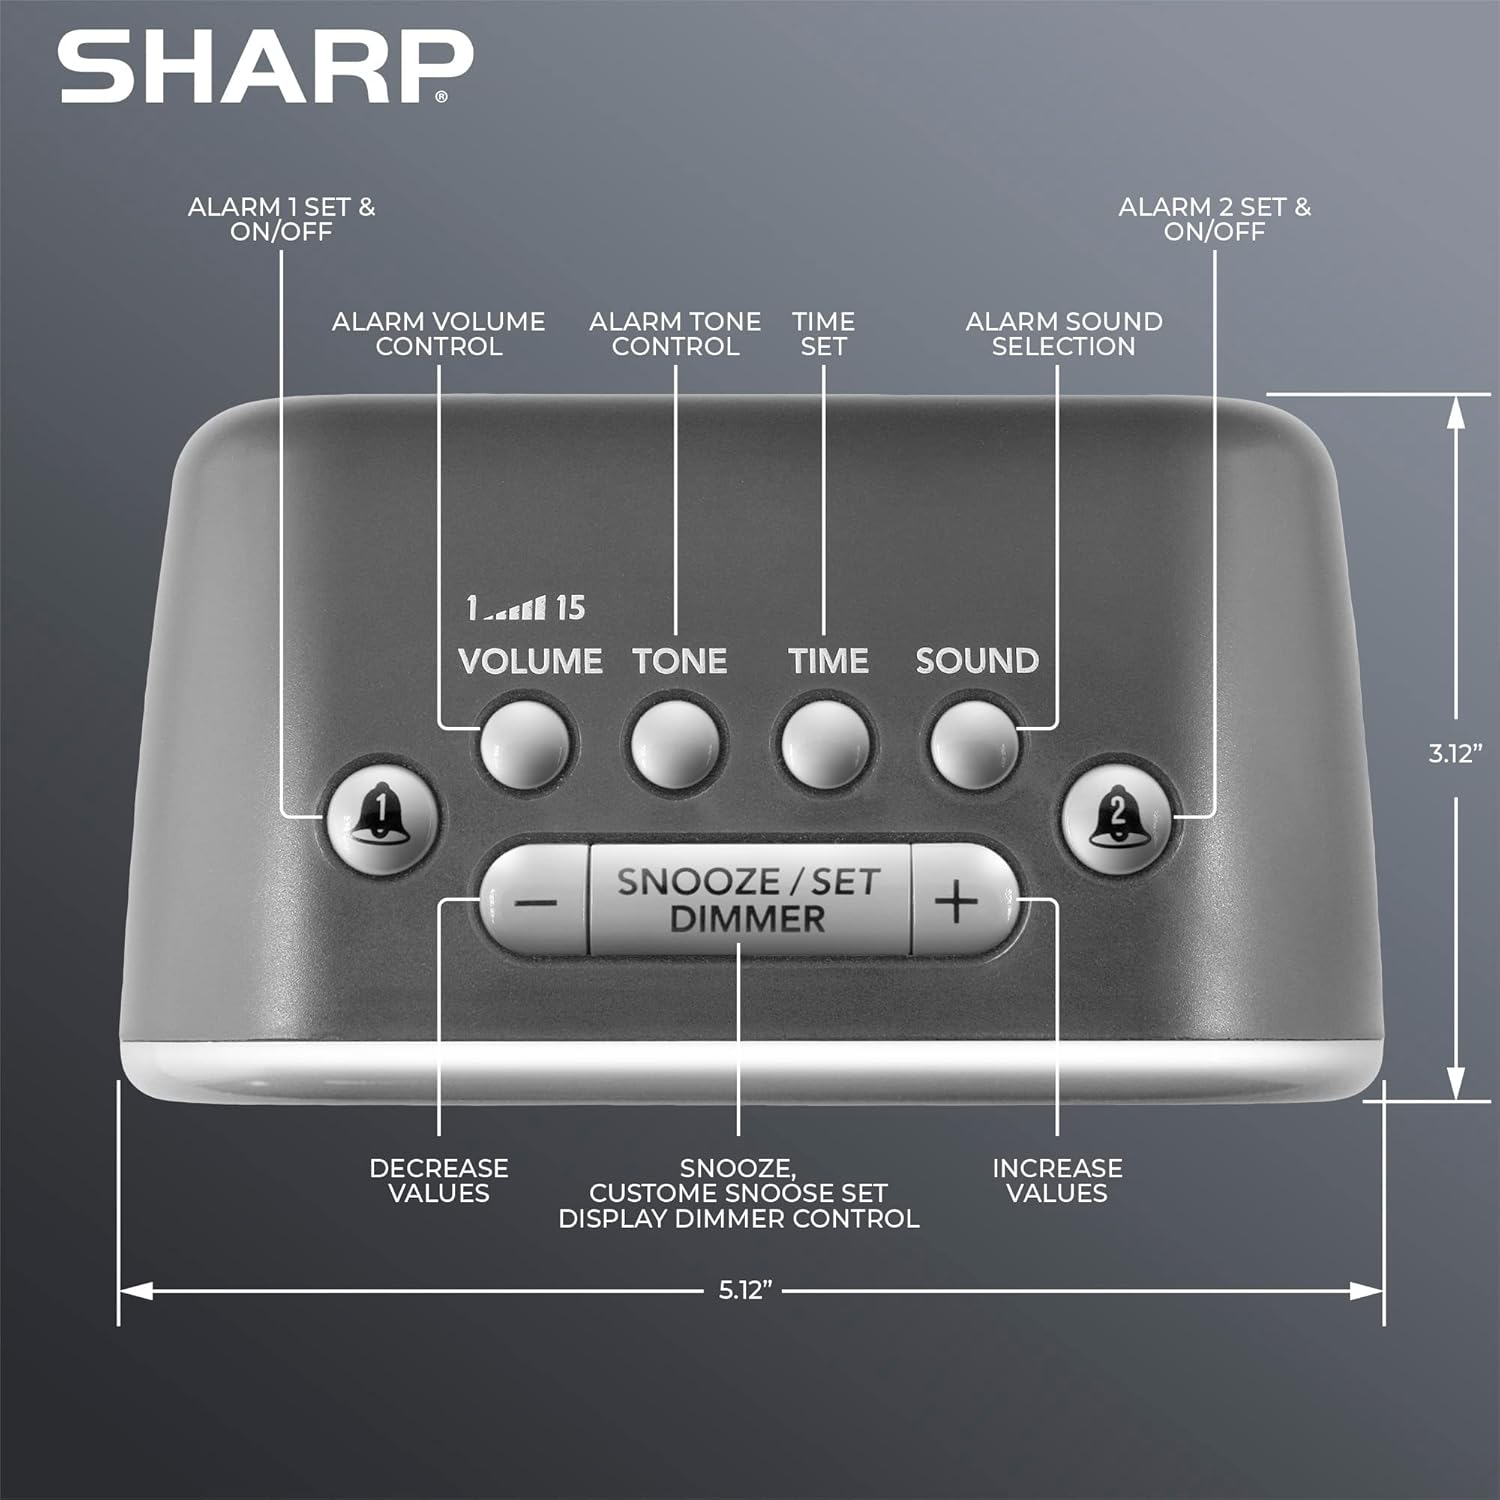
Ata: Luga view of the alarm clock, highlighting buttons for Alarm 1, Alarm 2, Volume, Tone, Time, Sound, Snooze/Set/Dimmer, and +/- controls.
- Fa'aaliga: Large white LED display for time and settings.
- Alarm 1 & 2 Buttons: Activate/deactivate and set individual alarms.
- Fa'amau: Adjusts alarm volume (levels 1-15).
- Ki leo: Adjusts alarm tone.
- Ki Taimi: Used for setting the current time.
- Ki leo: Selects one of the six alarm sounds.
- Snooze/Set/Dimmer Button: Activates snooze, confirms settings, and adjusts display brightness.
- +/- Ki: Adjust values for time, volume, tone, and snooze duration.
Seti
1. So'oga Malosi
- Plug the AC power adapter into the DC IN jack on the back of the alarm clock.
- Plug the other end of the adapter into a standard 110V/120V household wall outlet.
- The display will light up, indicating power is connected.
2. Fa'apipi'i Fa'aola maa
The alarm clock requires 2 x AAA batteries (not included) for battery backup. This feature stores your time and alarm settings during a power interruption. The display will not be lit during battery backup mode.
- Tatala le ufiufi vaega o maa i le pito i lalo ole iunite.
- Insert 2 new AAA batteries, observing the correct polarity (+ and -).
- Tapuni lelei le ufiufi o le vaega o maa.

Image: The alarm clock positioned on a nightstand, ready for use.
Fa'atonuga o Galuega
1. Setting the Current Time
- Oomi ma uu le TAIMI faamau seia emo mai numera o le itula.
- Fa'aaoga le + or - buttons to adjust the hour. Pay attention to the PM indicator.
- Oomi le TAIMI button again to confirm the hour, and the minute digits will flash.
- Fa'aaoga le + or - faamau e fetuunai ai minute.
- Oomi le TAIMI button once more to save the time setting.
2. Setting Alarms (Alarm 1 and Alarm 2)
This clock features two independent alarms.
- Oomi ma uu le FAʻAALIGA 1 or FAʻAALIGA 2 faamau seia emo le numera o itula fa'ailo.
- Fa'aaoga le + or - buttons to adjust the alarm hour. Observe the PM indicator.
- Oomi le vaega ALAGALO button again to confirm the hour, and the minute digits will flash.
- Fa'aaoga le + or - fa'amau e fetu'una'i minute fa'ailo.
- Oomi le ALAGALO button once more to save the alarm time. The alarm indicator (bell icon) for the set alarm will appear on the display.
- To activate or deactivate an alarm, simply press the FAʻAALIGA 1 or FAʻAALIGA 2 button briefly. The bell icon indicates if the alarm is active.
3. Selecting Alarm Sounds
The clock offers 6 distinct alarm sounds: Rooster, Bugle, Nagging Mom, Jackhammer, Siren, and Beep.

Image: Visual representation of the six available alarm sounds.
- With an alarm set, press the LEO button. The current sound icon will flash.
- Fa'aaoga le + or - buttons to cycle through the available sounds.
- Oomi le LEO toe faamau e fa'amaonia lau filifiliga.
4. Adjusting Alarm Volume and Tone
You can customize the volume (up to 115dB) and tone of your chosen alarm sound.

Image: Decibel reference scale illustrating the loudness of the alarm clock compared to common sounds.
- Oomi le TUSI button. The current volume level (1-15) will flash.
- Fa'aaoga le + or - faamau e fetuunai ai le leo.
- Oomi le TUSI toe faamau e faamaonia.
- Oomi le LEO button. The current tone setting will flash.
- Fa'aaoga le + or - buttons to adjust the tone.
- Oomi le LEO toe faamau e faamaonia.
5. Galuega Fa'amoe
A tatagi le faailo, oomi le tele SNOOZE/SET/DIMMER button on top of the clock to temporarily silence the alarm. The default snooze time is 9 minutes.
Customizing Snooze Duration:
- While the alarm is sounding, press and hold the SNOOZE/SET/DIMMER button until the snooze time flashes.
- Fa'aaoga le + or - buttons to set your desired snooze duration (1-59 minutes).
- Oomi le SNOOZE/SET/DIMMER button again to save the custom snooze time.
6. Display Dimmer Control
The display has 3 brightness levels (Off, Low, High).
- Oomi faapuupuu le SNOOZE/SET/DIMMER button (when the alarm is not sounding) to cycle through the brightness levels: High > Low > Off.

Ata: Ua umaview of key features including display, volume, sounds, and controls.
Tausiga
Fa'amamaina
- Unplug the alarm clock from the power outlet before cleaning.
- Solo le pito i fafo i se ie vaivai ma mago.
- Aua ne'i fa'aogaina ni mea e fa'amamā ai, solo, po'o so'o.
Suiga maa
- Afai e leiloa le taimi po'o le fa'ailo o le uati i le taimi o le paoa outage, the AAA backup batteries may need replacement.
- Follow the battery installation steps in the Setup section to replace the batteries.
Fa'afitauli
| Fa'afitauli | Mafuaaga e ono tupu | Fofo |
|---|---|---|
| Alarm does not sound or is too quiet. | Alarm is not activated; Volume is too low; Incorrect sound selected. | Ensure the alarm bell icon is displayed. Adjust the volume using the VOLUME button. Verify the selected alarm sound. |
| Display is off during a power outage. | Battery backup only retains settings, not display power. | This is normal operation. The display will relight when power is restored. Ensure backup batteries are fresh to retain settings. |
| Time or alarm settings are lost. | Power interruption and/or dead backup batteries. | Replace the 2 x AAA backup batteries. Reset the time and alarm settings. |
| Ua le tali mai ki. | Fa'aletonu polokalame le tumau. | Unplug the unit from the power outlet for a few minutes, then plug it back in. |
Fa'amatalaga
- Fa'ailoga: Ma'ai
- Fa'ata'ita'iga: B0BDPQNVMR
- Punavai Malosi: Corded Electric (110V/120V compatible)
- Fa'aola ma'a: 2 x AAA maa (e le o aofia ai)
- Volo Fa'alogo: E oʻo atu i le 115dB
- Leo Fa'ailoga: 6 (Rooster, Bugle, Nagging Mom, Jackhammer, Siren, Beep)
- Fa'aaliga: White LED with 3-level dimmer (High, Low, Off)
- Fua (Pe tusa): 5.12" (Width) x 3.12" (Height) x 3.55" (Depth)
- mamafa: 12.5 aunese
- Mea: Acrylonitrile Butadiene Styrene (ABS)
- UPC: 049353008608
Fa'amaonia ma Lagolago
For warranty information and customer support, please refer to the documentation provided at the time of purchase or contact Sharp customer service directly. You can also visit the official Sharp store for more information:


