1. Folasaga
Thank you for choosing the DazzlingStage 60W 9LED RGBW Stage Wall Wash Bar Light. This manual provides essential information for the safe and effective operation of your lighting fixture. Please read it thoroughly before installation and use, and retain it for future reference.
O lenei stage light bar features 9 high-power RGBW LEDs, offering a wide spectrum of colors and dynamic lighting effects suitable for various events and venues.

Ata 1.1: Ua umaview of the DazzlingStage 60W 9LED RGBW Stage Wall Wash Bar Lights in various colors.
2. Faatonuga Saogalemu
- Saogalemu Faaeletise: Ia mautinoa le sapalai eletise voltage matches the specifications of the fixture. Always disconnect power before cleaning, servicing, or moving the unit.
- Fa'apipi'i: Install the fixture in a well-ventilated area, away from heat sources. Ensure secure mounting to prevent accidental falls.
- Galuega: Do not look directly into the light source when the fixture is operating, as it can cause eye damage. Avoid operating the unit in wet or damp tulaga.
- Tausiga: Refer all servicing to qualified personnel. Do not attempt to repair the unit yourself.
- Tamaiti: Taofi le masini mai le aapa atu i tamaiti.
3. Mea i totonu o le afifi
Upon unpacking, please verify that all items listed below are included and in good condition:
- DazzlingStage 60W 9LED RGBW Stage Wall Wash Bar Light (x1 per pack)
- Power Cord (x1 per pack)
- Remote Control (x1 per pack)
- Mounting Bracket (x1 per pack)
- Knobs (x2 per pack)
- Black Gaskets (x2 per pack)
- Instruction Manual (x1 per pack)

Image 3.1: Contents included in the product package.
4. Vaega o oloa
Familiarize yourself with the main components of the light bar:
- LED Array: 9 RGBW LEDs for color mixing.
- Vaega Pule: Features a 4-digit LED display and control buttons (MENU, UP, DOWN, ENTER) for mode selection and parameter adjustment.
- DMX IN/OUT Ports: For connecting to a DMX controller or linking multiple units.
- Power IN/OUT: For power connection and daisy-chaining power to other units.
- Faapipii puipui: Adjustable bracket for floor standing or truss mounting.
- Su'e vevela: Integrated cooling system to maintain optimal operating temperature.

Image 4.1: Key components and dimensions of the light bar.
5. Seti ma Fa'apipi'i
The DazzlingStage Wall Wash Bar Light offers flexible installation options:
5.1 Fa'amauina o le Fa'amau
Attach the included mounting bracket to the light bar using the provided knobs and gaskets. Ensure the bracket is securely fastened.
5.2 Filifiliga Tulaga
- Tu'u Folafola: The bracket allows the light bar to stand upright on a flat surface. Adjust the angle as needed.
- Fa'apipi'iina o le Truss: Fa'aaogā clamps (not included) to attach the bracket to a lighting truss. Ensure the truss and clamps can support the weight of the fixture.
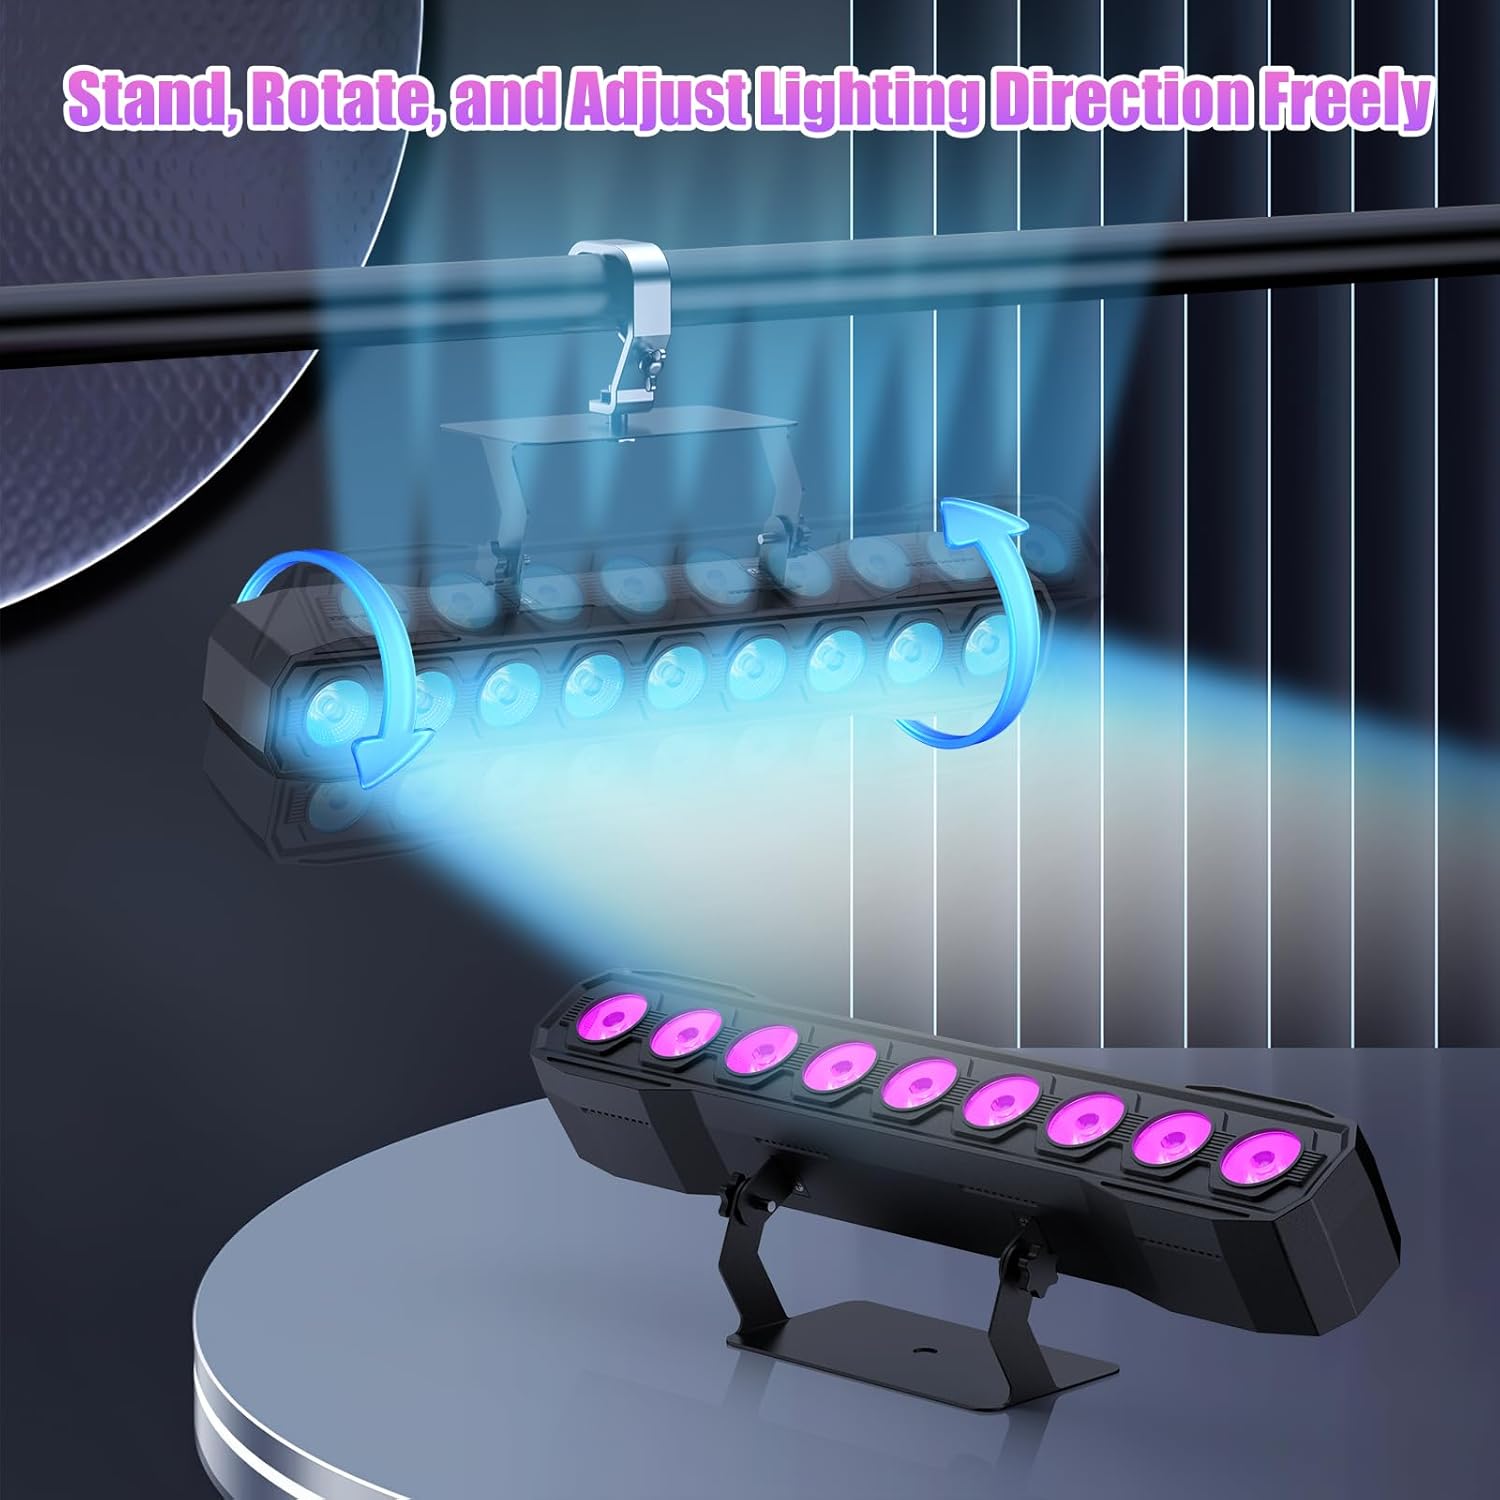
Image 5.1: Illustration of mounting and angle adjustment options.
5.3 So'oga Malosi
Connect the power cord to the Power IN port on the back of the fixture and then to a suitable power outlet. Multiple units can be daisy-chained using the Power OUT port to simplify wiring for larger setups.
6. Faiga Fa'atino
The DazzlingStage Wall Wash Bar Light supports several control modes:
- DMX512 Pulea: For professional control via a DMX console.
- Faiga taavale: Fa'asologa o moli ua uma ona polokalameina.
- Sound-Activated Control: E tali atu moli i leo o lo'o si'omia ai.
- Pulea Mamao: Convenient wireless control using the included remote.
- Tulaga Matai-Pologa: Link multiple units where one acts as a master and others as slaves, synchronizing effects.
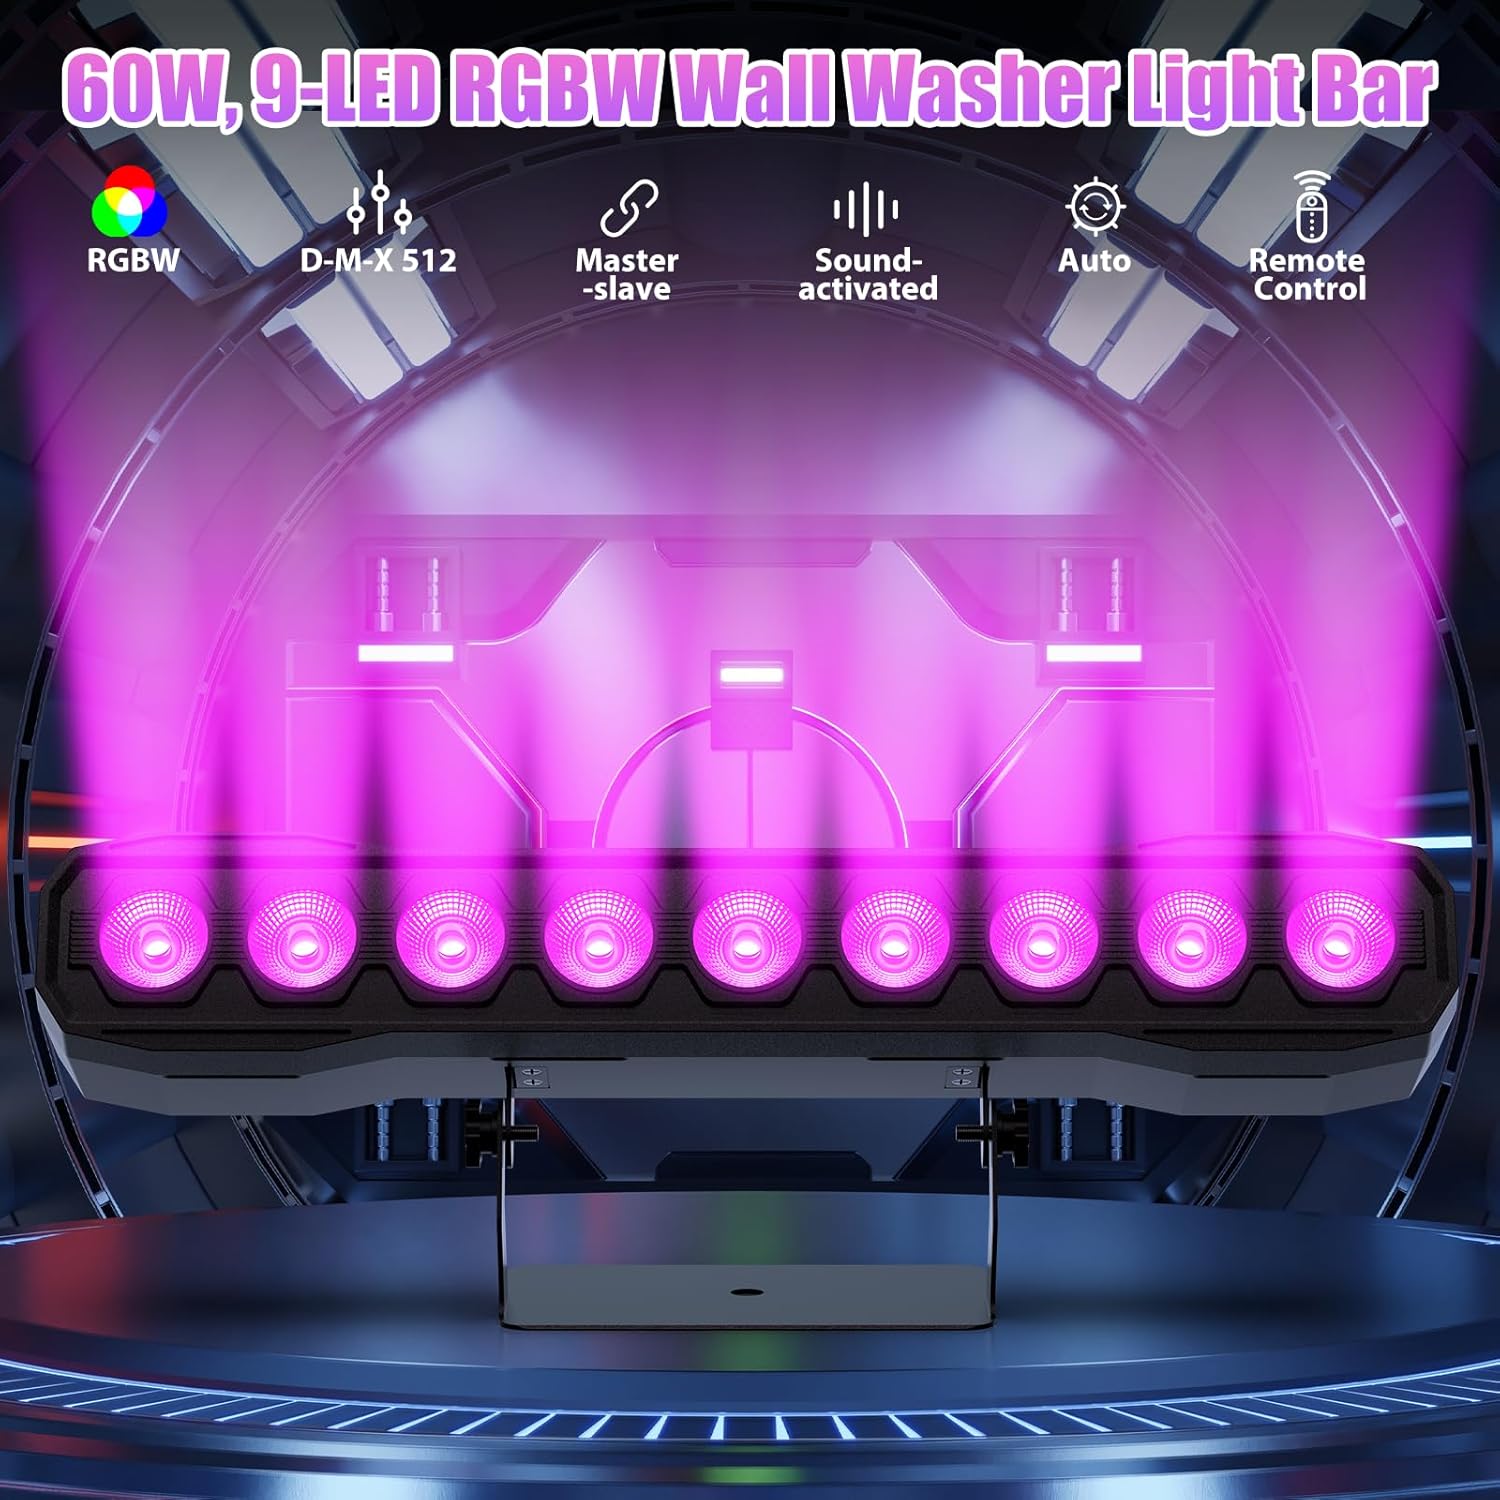
Ata 6.1: Ua umaview of available control modes.
6.1 Display Panel Operation
Use the buttons on the back of the fixture to navigate the menu and select modes:
- MENU: Taamilomilo i filifiliga autu autu.
- Luga / LOSI: Adjusts values or navigates sub-menus.
- Ulufale: Fa'amaonia le filifiliga.
6.2 Aafiaga o moli
The fixture supports various dynamic effects:
- Fa'afefiloi lanu: Over 16.7 million color combinations with 0-100% linear dimming.
- Sulu Aafiaga o le emo.
- oso: Instant color changes.
- Mata'u: Fesuiaiga sologa lelei i le va o lanu.
- Pusa: Gradual changing effects.
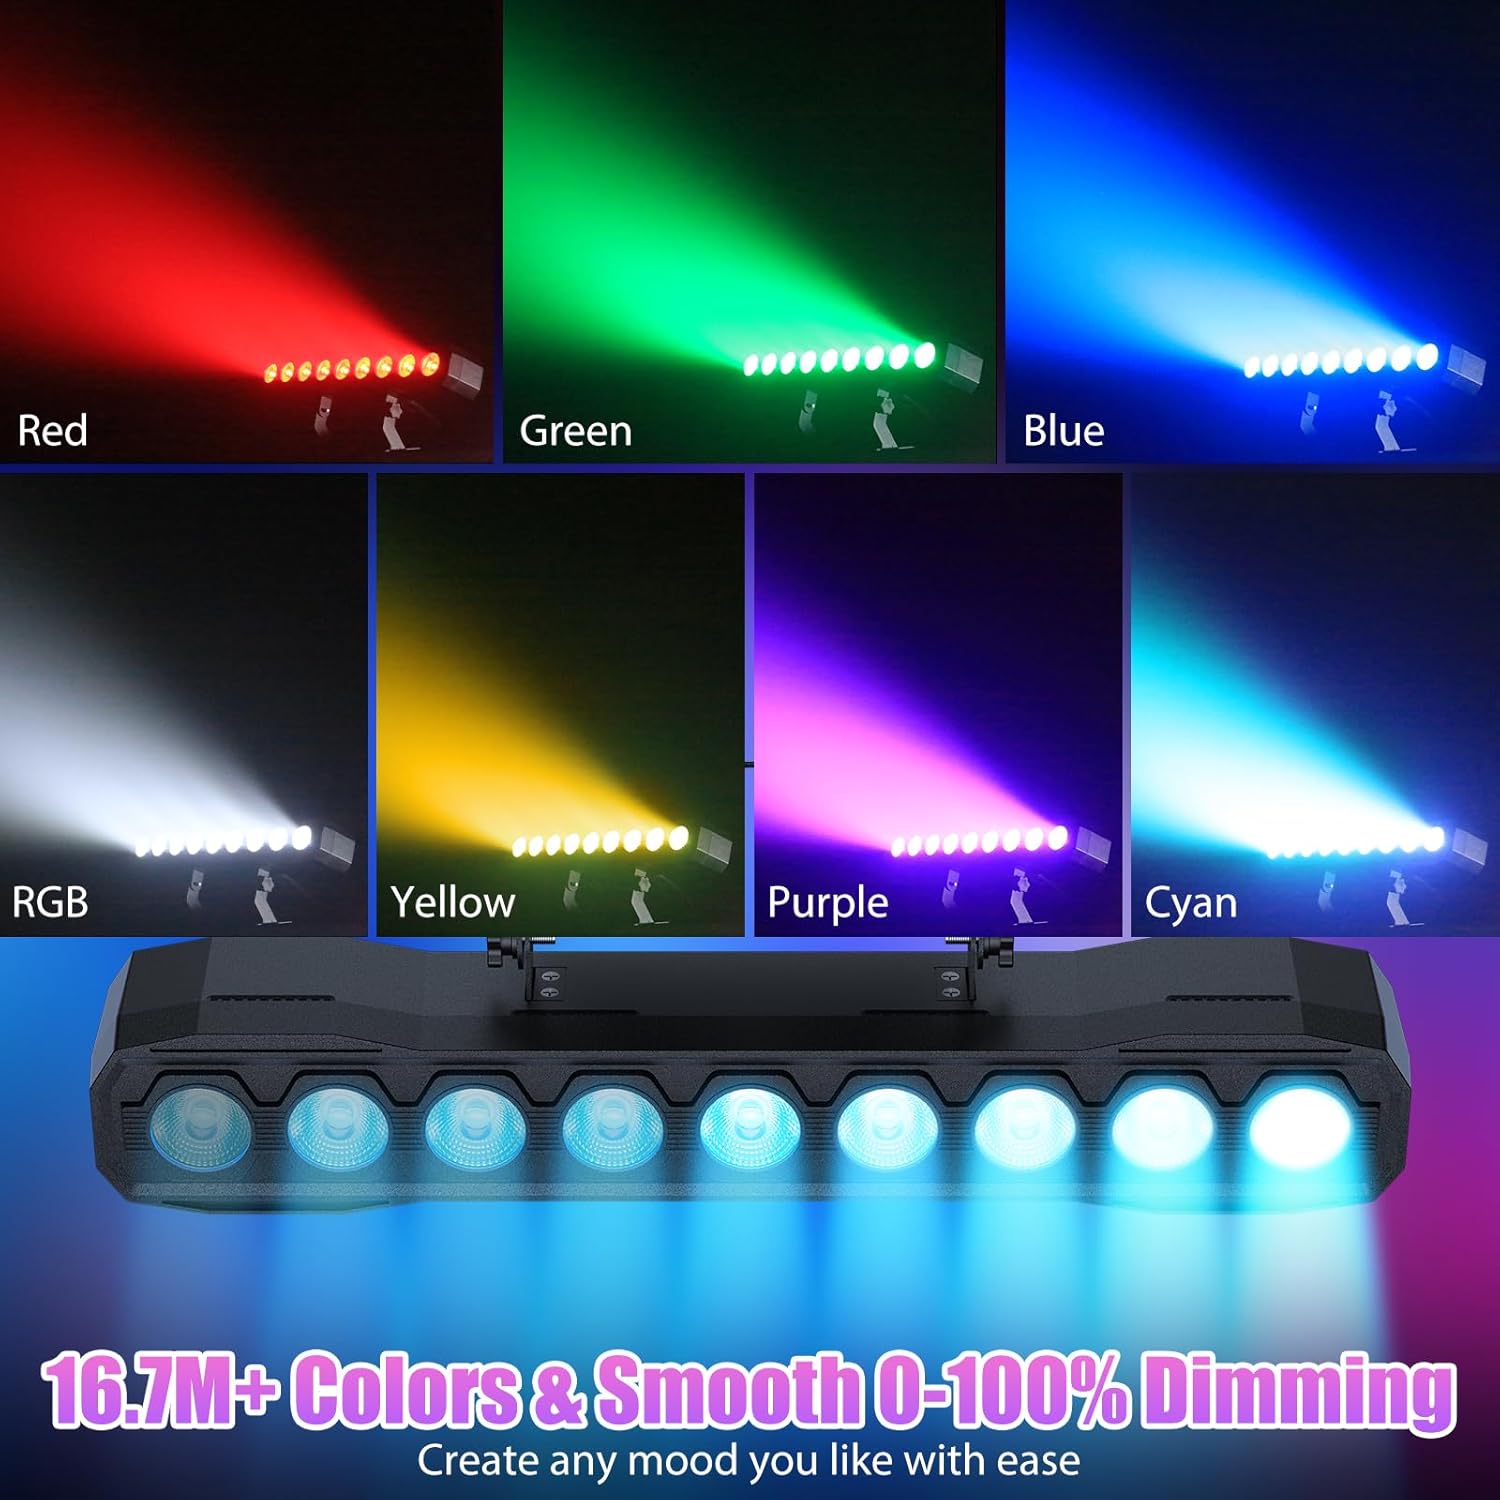
Ata 6.2: Esoamples of color mixing and dimming capabilities.

Image 6.3: Visual representation of Strobe, Jump, Fade, and Pulse effects.
7. Galuega Fa'atonu mamao
O le fa'aogaina mamao e maua ai avanoa avanoa i galuega eseese:
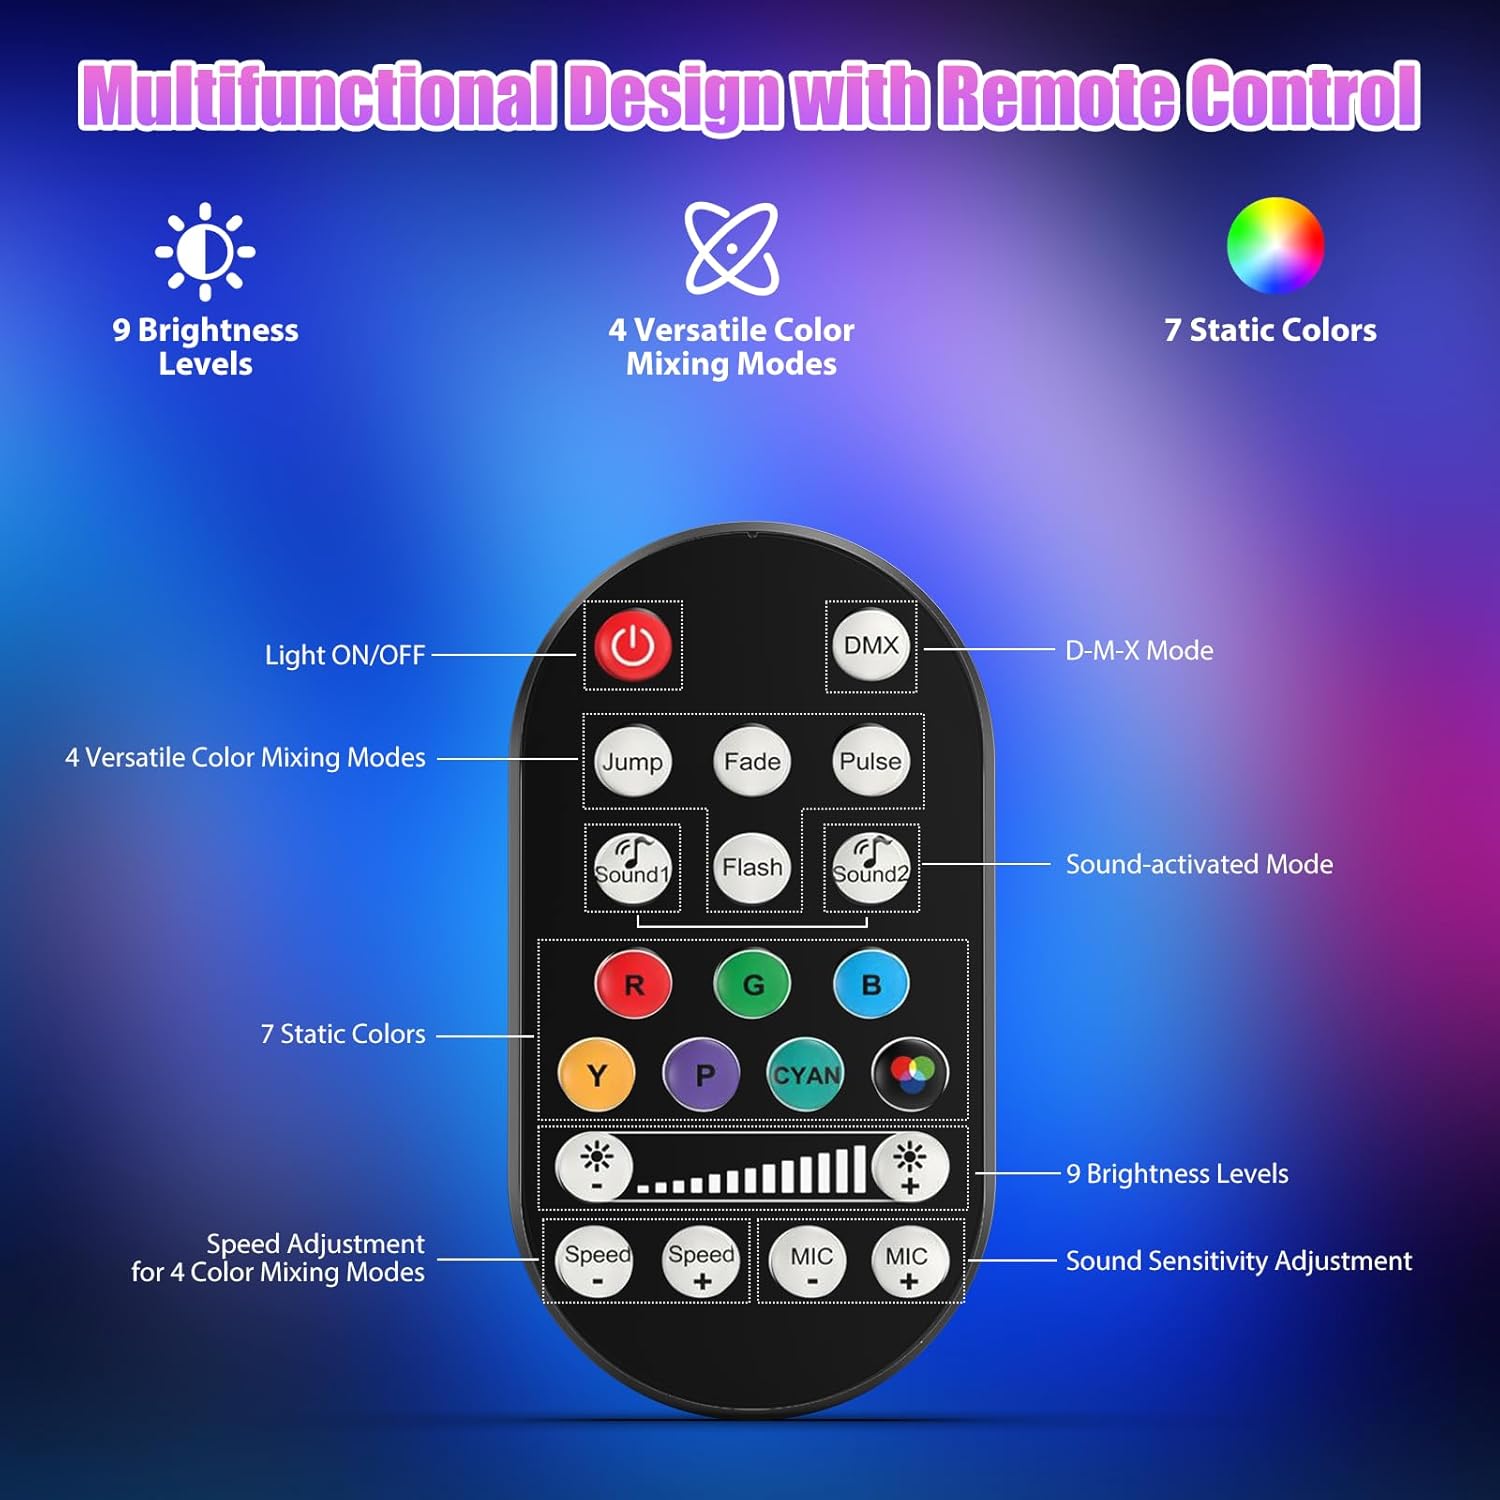
Image 7.1: Remote control layout and functions.
- Moli ON/OFF: Fa'aola le iunite i luga pe tape.
- DMX: Activates DMX control mode.
- Jump, Fade, Pulse, Flash: Selects different color mixing modes.
- Sound1, Sound2: Activates sound-activated modes with different sensitivities.
- R, G, B, Y, P, Cyan, White: Selects static colors.
- Tulaga pupula: Adjusts the overall intensity of the light (9 levels).
- Saosaoa +/-: Adjusts the speed of dynamic effects.
- MIC +/-: Adjusts the sound sensitivity for sound-activated modes (15 levels).
8. DMX512 Control
For advanced control, connect the fixture to a DMX512 controller. The light bar typically uses 4 or 8 DMX channels. Refer to the display panel for DMX address setting and channel assignments.
8.1 Fa'atulagaina o Tuatusi DMX
Use the MENU, UP, DOWN, and ENTER buttons on the fixture's display panel to set the DMX starting address. The display will show 'AXXX' where XXX is the address (e.g., A001).
8.2 DMX Channel Functions (Example - 8 Channel Mode)
| Auala | Galuega | Tulaga Taua | Fa'amatalaga |
|---|---|---|---|
| CH1 | Matai Dimmer | 0-255 | Aotelega le malamalama (0% i le 100%) |
| CH2 | Malosi mumu | 0-255 | Red LED brightness (0% to 100%) |
| CH3 | Green Intensity | 0-255 | Green LED brightness (0% to 100%) |
| CH4 | Blue Intensity | 0-255 | Blue LED brightness (0% to 100%) |
| CH5 | Pa'epa'e Malosi | 0-255 | White LED brightness (0% to 100%) |
| CH6 | Strobe/Effect | 0-255 | 0-10: No function; 11-255: Strobe speed (slow to fast) |
| CH7 | Polokalama Taʻavale | 0-255 | Selects and controls speed of built-in auto programs |
| CH8 | Leo Galue | 0-255 | Activates sound mode and adjusts sensitivity |
Laulau 8.1: Esoample DMX Channel Functions (may vary slightly by firmware version).
9. Tausiga
Regular maintenance ensures optimal performance and extends the lifespan of your fixture.
- Fa'amamaina: Periodically clean the lens and housing with a soft, lint-free cloth. Do not use abrasive cleaners or solvents. Ensure the fixture is powered off and cool before cleaning.
- Asiasiga: Regularly check power cables, DMX cables, and mounting hardware for any signs of wear or damage. Replace damaged components immediately.
- Teuina: When not in use for extended periods, store the fixture in a dry, dust-free environment.
10. Faʻafitauli
Afai e te feagai ma faʻafitauli, faʻafesoʻotaʻi faʻafitauli masani nei ma fofo:
| Fa'afitauli | Mafuaaga e ono tupu | Fofo |
|---|---|---|
| Leai se mana | Power cable disconnected; No power from outlet; Blown fuse | Check power cable connection; Test outlet with another device; Replace fuse if necessary |
| Leai se malamalama e maua mai | Dimmer channel at 0%; Incorrect mode selected; DMX signal issue | Increase dimmer level; Select desired operating mode; Check DMX cable and address settings |
| Incorrect colors/effects | Incorrect DMX channel values; Remote control interference | Verify DMX channel settings; Ensure remote is pointed directly at the sensor; Check for other IR interference |
| Leo-fa'agaoioia faiga e le o galue | Microphone sensitivity too low; No sound input | Increase MIC sensitivity via remote or display; Ensure sufficient sound is present near the fixture |
| Fa'avevela o mea fa'apipi'i | Poor ventilation; Blocked heat sink | Ensure adequate airflow around the unit; Clean any dust or debris from the heat sink fins |
11. Fa'amatalaga
| Fa'aaliga | Fa'amatalaga |
|---|---|
| Fa'ailoga | DazzlingStage |
| Numera Fa'ata'ita'i | ZQ06190 |
| Punavai Malamalama | 9 x 60W RGBW LED |
| Fa'afefiloi Lanu | RGBW 4-in-1, 16.7 million colors |
| Fa'alilo | 0-100% laina eletise faaeletonika faanenefu |
| Su'ega Beam | 35° Matamata Lautele |
| Faiga Fa'atonu | DMX512, Auto, Sound-Activated, Remote Control, Master-Slave |
| Auala DMX | 4 or 8 Channels (selectable) |
| Fa'aaliga | 4-numera fa'aaliga LED |
| Mea | Acrylonitrile Butadiene Styrene (ABS) |
| Fua o Mea | 18.1 x 5.5 x 5.1 inisi (46 x 14 x 13 cm) |
| Mea mamafa | Pe tusa. 1.98 pauna (0.9 kilokalama) |
| Malosiaga Ulufale | AC 100-240V, 50/60Hz |
| Tufuga | Shenzhen Zhuoqiong Technology Co., Ltd. |
12. Fa'amaonia ma Lagolago
DazzlingStage products are designed for reliability and performance. For warranty information, please refer to the terms and conditions provided at the time of purchase or contact your retailer.
If you require technical assistance or have questions not covered in this manual, please contact DazzlingStage customer support through the retailer's platform or the official brand website. Please have your model number (ZQ06190) and purchase details ready when contacting support.