
Folasaga
Thank you for choosing the CAMECHO 1 DIN 7-inch Car Radio. This device offers a comprehensive in-car entertainment and connectivity solution, featuring a manually retractable IPS touchscreen, wireless Carplay and Android Auto, Bluetooth 4.2, AM/FM/RDS radio, and multiple media playback options. This manual provides detailed instructions for installation, operation, and maintenance to ensure optimal performance and user satisfaction.
O mea taua e aofia ai:
- 7-inch IPS Touchscreen (1024x600) with manual retraction
- Wireless Carplay and Android Auto support
- Wired Mirror Link for iOS/Android smartphones
- Bluetooth 4.2 for hands-free calls and music streaming
- AM/FM/RDS Radio (87.5-108MHz)
- USB and TF Card media playback
- 4x45W audio output with 10-band EQ
- Steering Wheel Control (SWC) support
- Optional rear camera input for parking assistance
- Multi-language support (including English, Italian, German, Spanish)
Seti
1. Tatala le Pusa
Carefully unpack all items from the box. Ensure all components are present before proceeding with installation.
O le afifi e tatau ona iai:
- 1 x CAMECHO MP5 Car Player
- 1 x Uaea Malosi
- 1 x Horn Cable
- 2 x Disassembly Tools
- 1 x Mai fafo Microphone
- 1 x Steering Wheel Control Unit
- 1 x User Manual (lenei pepa)
2. Fa'atonu Taiala
This unit is designed for universal 1 DIN installation and operates on a 12V power supply. It is compatible with 99% of cars. For detailed wiring instructions, please refer to the wiring diagram provided with the product. Professional installation is recommended.
Fa'amatalaga lautele Uea:
- Connect the yellow wire to the constant 12V power supply.
- Connect the red wire to the accessory (switched 12V) power supply.
- Faʻafesoʻotaʻi le uaea uliuli i le eleele.
- Connect speaker wires to the corresponding car speakers.
- Ensure all connections are secure to prevent short circuits or malfunctions.

Image: The CAMECHO 1 DIN 7-inch Car Radio with its retractable screen extended, showing the physical buttons and ports.
3. Uluai Malosiaga Ki
After installation, turn on your vehicle's ignition. The car radio should power on automatically. If not, press the power button on the unit. The screen will display the initial setup or home interface.
Fa'atonuga o Galuega
1. Basic Controls and Touchscreen Operation
The unit features a 7-inch IPS touchscreen with a resolution of 1024x600 pixels. You can interact with the system by touching, swiping, and tapping the screen. Physical buttons and a rotary knob are also available for common functions like volume control, mode selection, and power.
The screen is manually retractable. Gently pull or push the screen to adjust its angle or retract it when not in use.
2. Steering Wheel Control (SWC)
Connect the provided steering wheel control unit to your vehicle's SWC wires. This allows you to control basic functions such as volume, track skipping, and mode switching directly from your steering wheel, enhancing driving safety and convenience.

Image: Illustration of steering wheel controls interacting with the car radio interface, allowing for safe operation while driving.
3. Radio (AM/FM/RDS)
Select the "Radio" icon from the main menu. You can manually tune to stations or use the auto-scan function to find available frequencies (FM: 87.5-108MHz). Save your favorite stations to preset buttons for quick access. The RDS function displays station information where available.
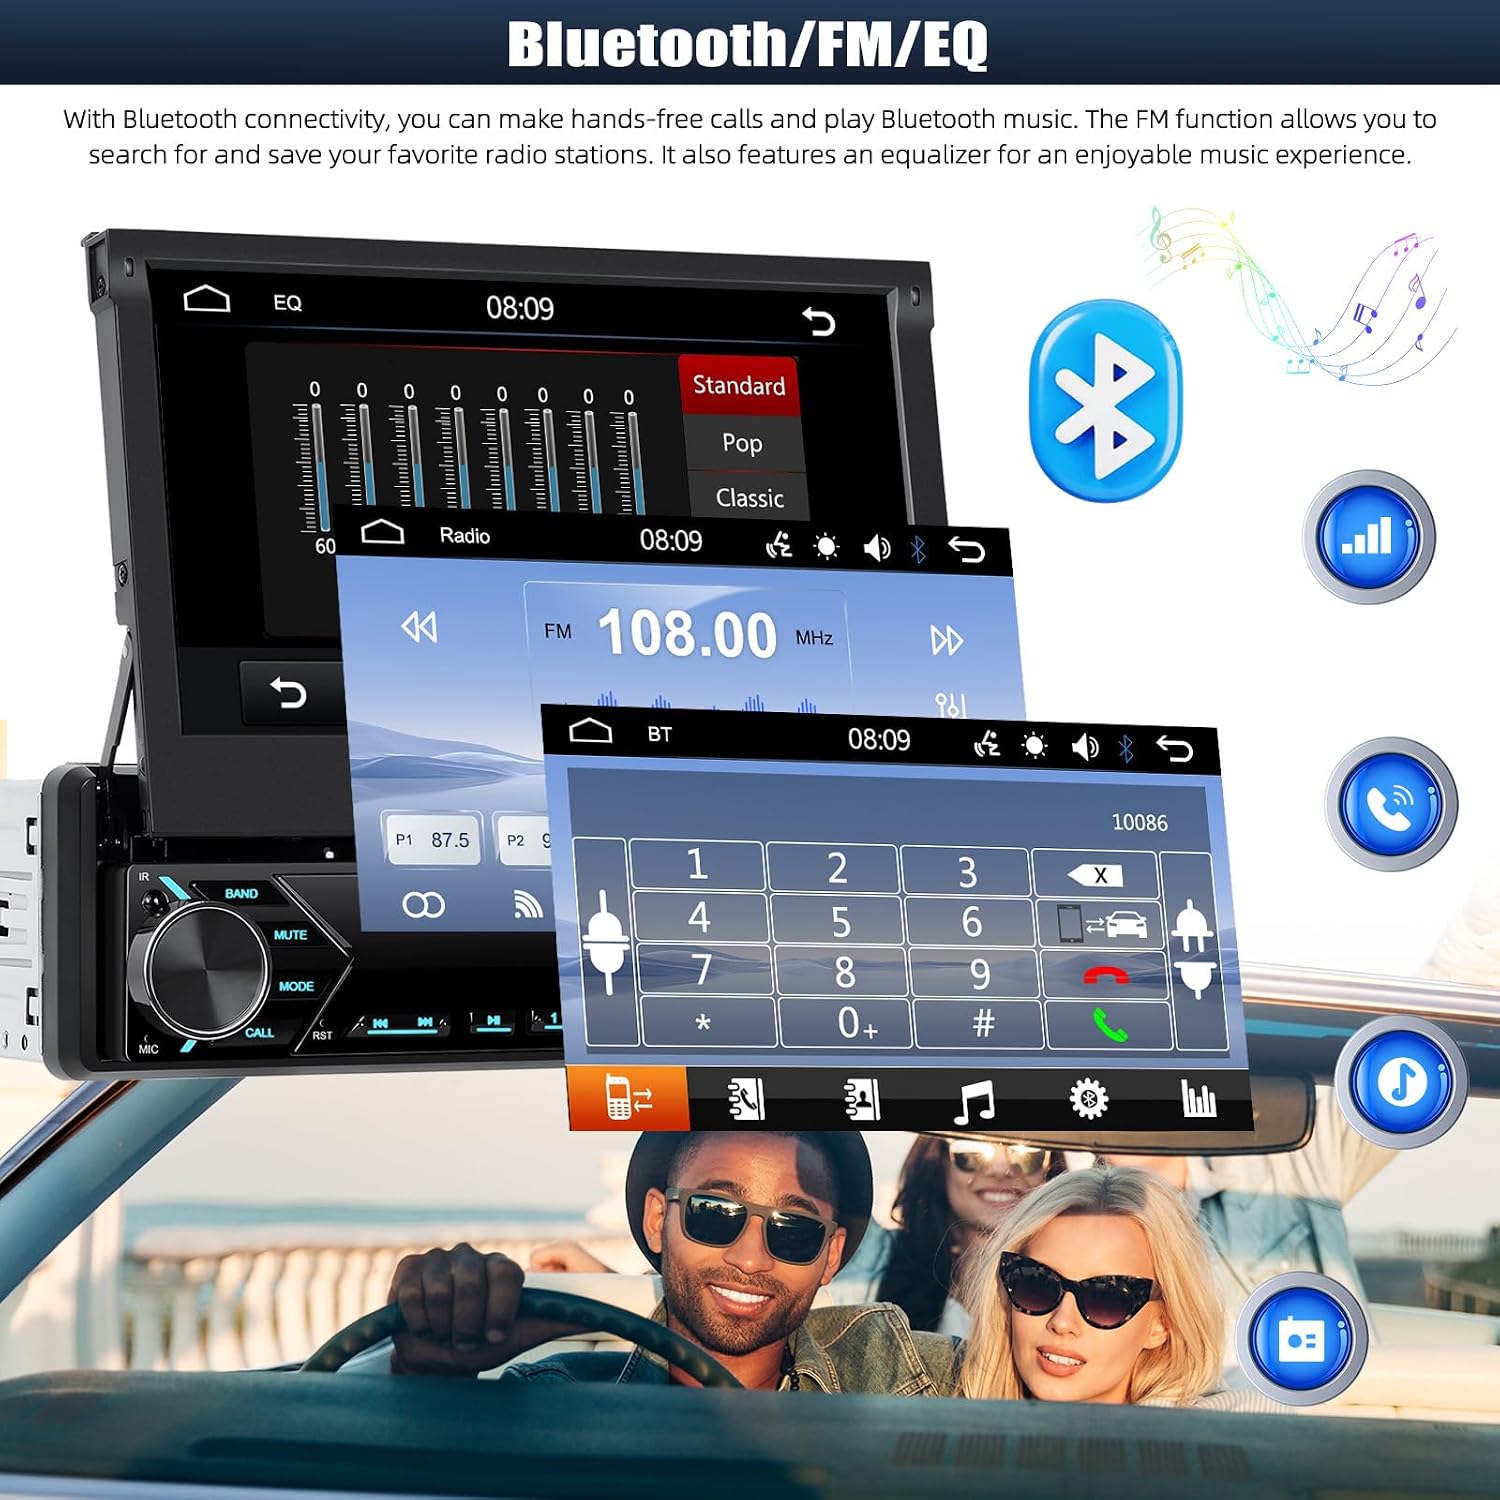
Image: The car radio display showing the FM radio interface, current frequency, and options for Bluetooth and equalizer settings.
4. Bluetooth Connectivity (Version 4.2)
E fetaui lau telefoni:
- Go to the "Bluetooth" menu on the car radio.
- Fa'agaoioi le Bluetooth i lau telefoni ma su'e masini avanoa.
- Select "CAMECHO" (or similar device name) from the list on your phone.
- Fa'amaonia le fa'ailoga fa'alua pe a fa'amalosia.
Once paired, you can make and receive hands-free calls using the external microphone and stream audio from your phone to the car speakers.
5. Wireless Carplay & Android Auto
This unit supports both wireless Carplay for iOS devices and wireless Android Auto for Android smartphones. These features allow you to seamlessly integrate your phone's interface with the car radio, accessing navigation, music, messages, and more.
Laasaga So'oga:
- Ia mautinoa ua fa'agaoioia le Bluetooth ma le Wi-Fi a lau telefoni.
- On the car radio, select the Carplay or Android Auto icon.
- Follow the on-screen prompts to connect your device. The system will automatically connect via Bluetooth and then establish a Wi-Fi connection for data transfer.
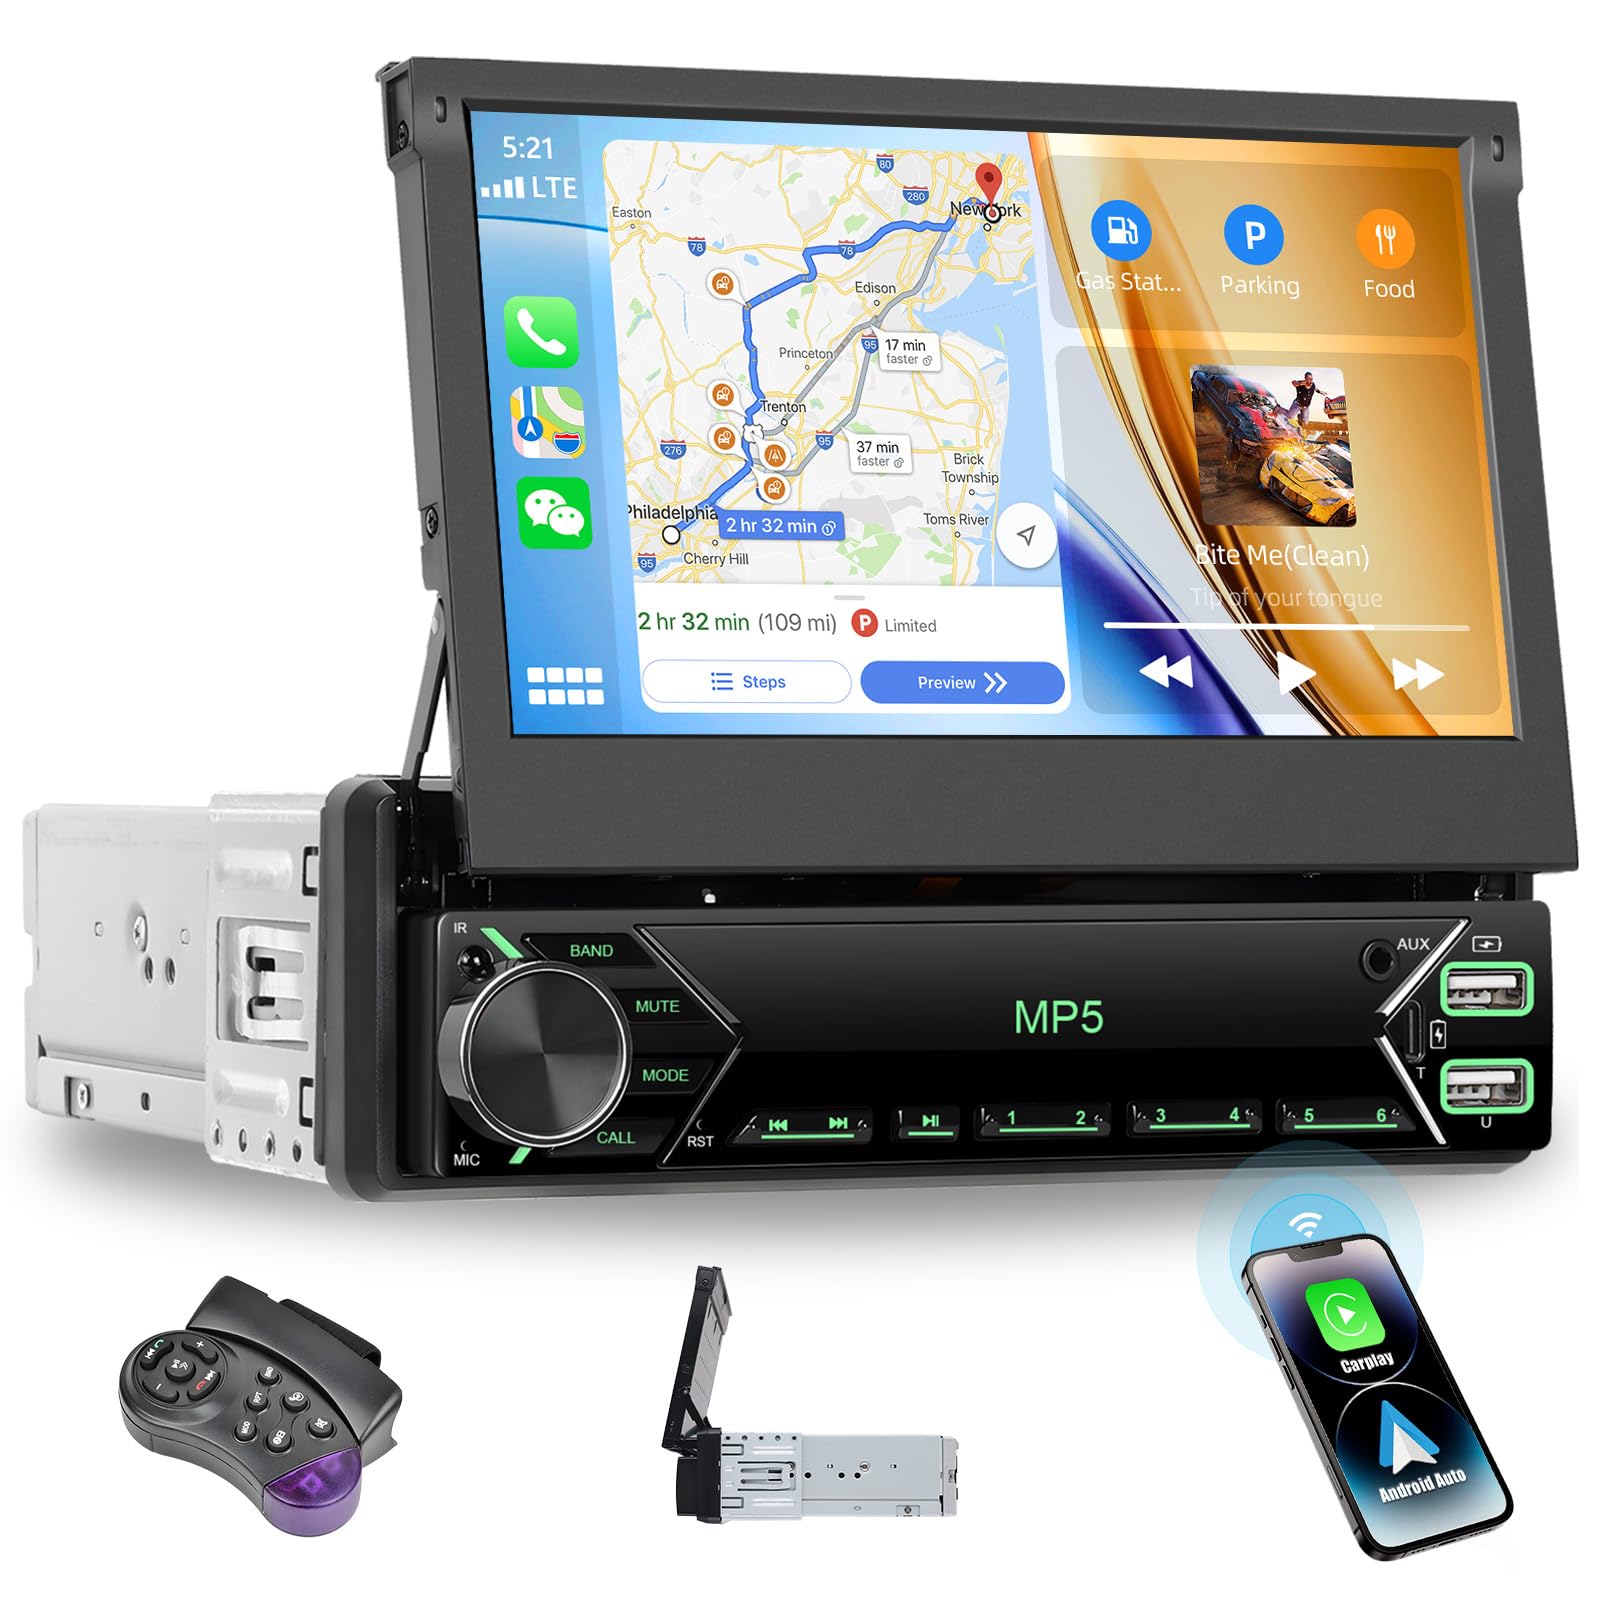
Image: The car radio demonstrating both Apple Carplay and Android Auto functionality, showing smartphone integration for navigation and apps.
6. Wired Mirror Link
For wired screen mirroring, connect your iOS or Android smartphone to the unit via a USB cable. This allows you to duplicate your phone's screen onto the car radio display, enabling control of apps, maps, and videos directly from the unit.
7. Media Playback (USB/TF Card)
Insert a USB drive into the USB port or a TF card into the TF card slot. The unit supports various audio and video formats:
- Leo: MP3, AAC, OGG, FLAC, APE
- Vitio: AVI, 3GP, MP4, MOV, MPG, MKV, VOB, RMVB, RM
Su'esu'e i au ala o faasalalauga files using the touchscreen interface. The USB and Type-C ports also support 5V_2A current for charging mobile devices.
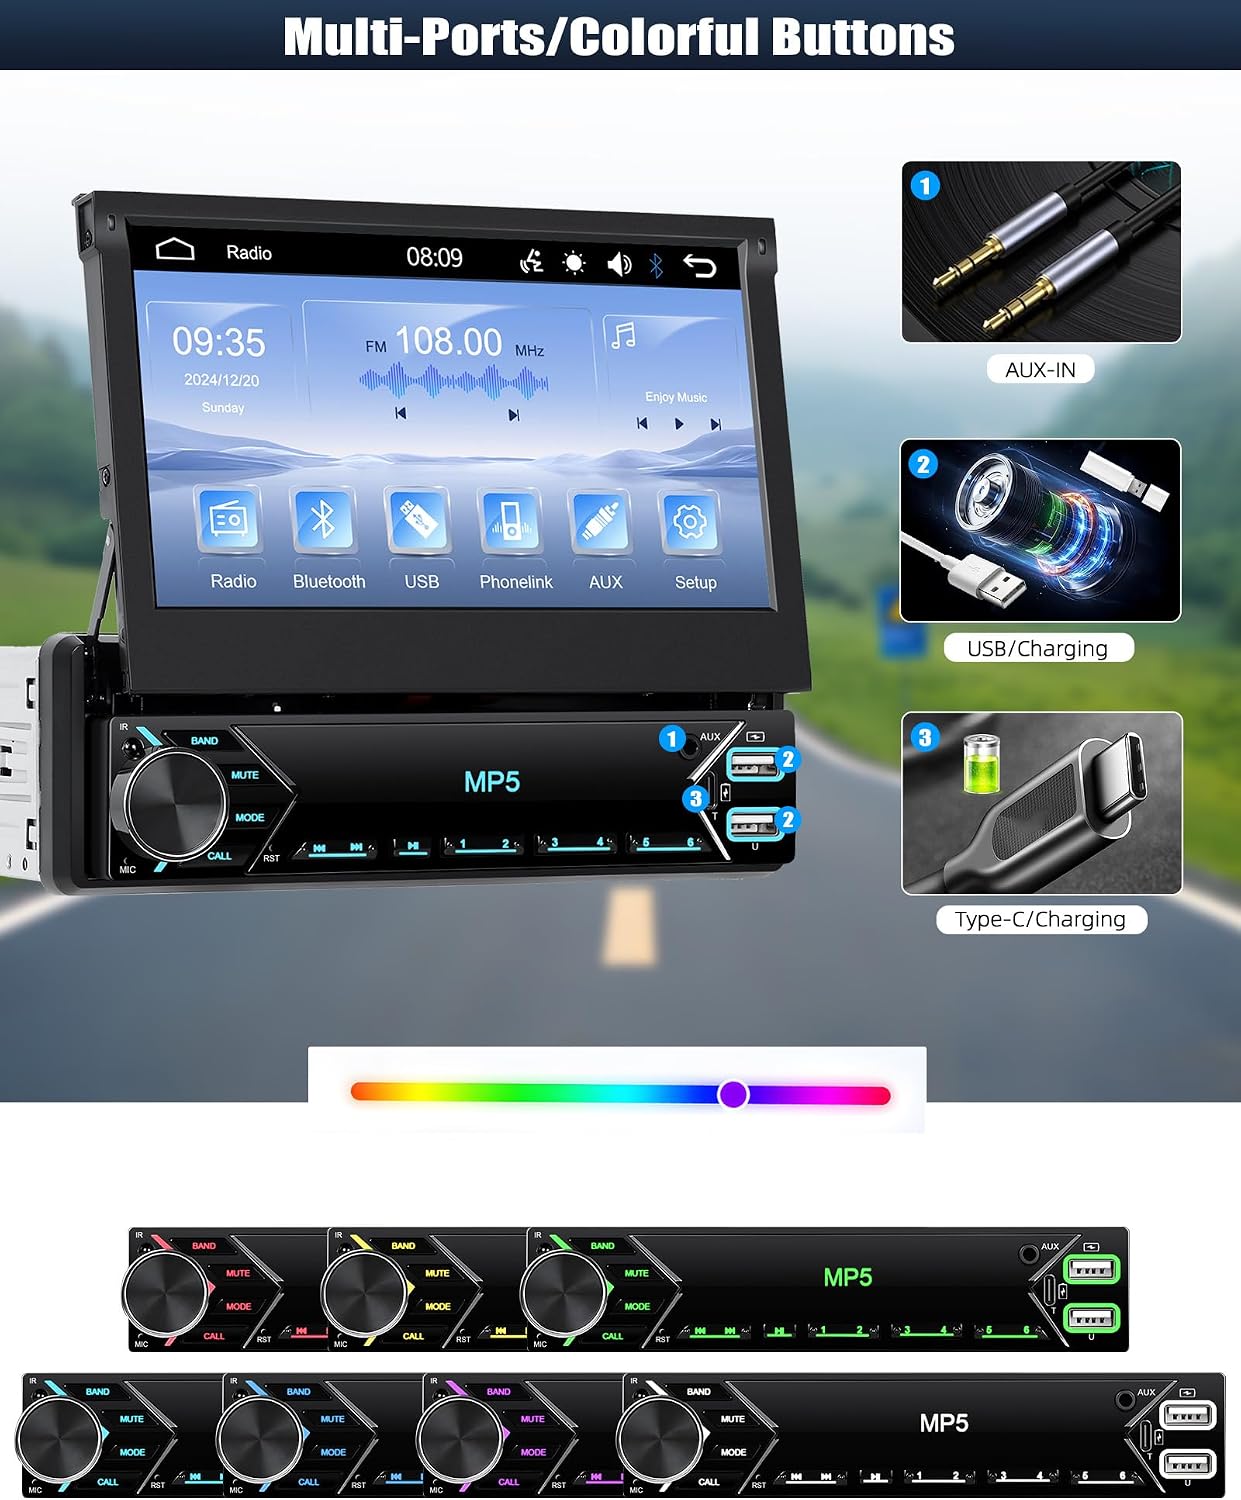
Image: The car radio's front panel highlighting the USB and Type-C charging ports, with a phone connected for charging and a USB drive for media.
8. Audio Settings and Equalizer (EQ)
The unit features a powerful 4x45W amplifier. Access the audio settings to adjust bass, treble, balance, and fader. A 10-band equalizer allows for detailed customization of the sound profile e fetaui ma ou mana'oga.
9. Video Output Function
The video output function enables simultaneous display of content on the car radio and external display devices (e.g., headrest monitors). This allows passengers to share the same video screen for entertainment.

Image: A car interior view demonstrating the video output function, with the main car radio screen and a rear-seat tablet playing the same video.
10. Reverse Assistance (Optional Camera)
If an optional rear-view camera (not included) is connected, the unit will automatically switch to the reversing screen when the vehicle is put into reverse gear. This provides a clear view of the area behind your vehicle, aiding in safer parking. Ensure the camera is properly installed and connected to the reverse trigger wire.

Image: The car radio screen displaying a simulated reverse camera view with parking assistance lines, indicating the functionality when a camera is connected.
11. Isi Galuega
The unit includes a calendar display function. The external microphone ensures clear audio for hands-free calls.
Tausiga
To ensure the longevity and optimal performance of your CAMECHO car radio, follow these maintenance guidelines:
- Fa'amama lau: Fa'aaogā se ie mālū, leai se liu e solo lemu le lau pa'i. Mo ma'a'a ma'a'a, fai sina oampi le ie i le vai po'o se fa'amama puipui. Aloese mai mea fa'afefe po'o vaila'au malosi.
- Fa'amamaina lautele: Keep the unit free from dust and debris. Use a soft brush or compressed air to clean around buttons and ports.
- Tempera: The unit is designed to operate within a temperature range of -30°C to 80°C. Avoid exposing it to extreme temperatures outside this range for extended periods.
- Suavai Fa'aaliga: Prevent liquids from entering the unit. In case of accidental spills, immediately power off the unit and allow it to dry completely before use.
Fa'afitauli
Afai e te feagai ma faʻafitauli i le leitio a lau taʻavale, tagaʻi i faʻafitauli masani nei ma fofo:
Leai se Malosi
- Check the power connections (yellow, red, black wires) to ensure they are securely connected and receiving power.
- Verify the vehicle's fuse for the radio is not blown.
- Ensure the ignition is on.
Leai se leo
- Siaki feso'ota'iga o uaea o le sipika.
- Ia mautinoa e le fa'alogoina le leo pe seti i le la'ititi.
- Verify audio settings (balance, fader, EQ) are correctly configured.
- Test with different audio sources (Radio, USB, Bluetooth).
Fa'afitauli Feso'ota'iga Bluetooth
- Ensure Bluetooth is enabled on both the car radio and your smartphone.
- Delete previous pairings on both devices and attempt to re-pair.
- Move your phone closer to the unit.
- Toe amata le leitio o le taavale ma lau telefonipoto.
Carplay/Android Auto Not Connecting
- For wireless connection, ensure both Bluetooth and Wi-Fi are active on your phone.
- For wired connection, use a high-quality USB cable.
- Check your phone's settings to ensure Carplay/Android Auto is enabled and allowed to connect to the unit.
- Restart the car radio and your phone.
Mata e Le Tali
- Perform a soft reset by pressing the reset button (if available) or by turning off the car ignition and restarting.
- Ensure the screen is clean and free from obstructions.
Fa'amatalaga
| Fa'aaliga | Fa'amatalaga |
|---|---|
| Fa'ailoga | CAMECHO |
| Ituaiga Mata | IPS Touchscreen, Manually Retractable |
| Tele lau | 7 inisi |
| I'uga mata | 1024x600 |
| Voltage | 12 V |
| Mata'utia Fa'aaogāga Malosi | 4 * 45W (180 Watt total) |
| Carplay/Android Auto | Lagolago uaealesi |
| Fa'aliliuga Bluetooth | 4.2 |
| Leitio Fa'aili | FM (87.5-108MHz) |
| Fa'alogo leo | MP3, AAC, OGG, FLAC, APE |
| Ata Vitio | AVI, 3GP, MP4, MOV, MPG, MKV, VOB, RMVB, RM |
| Feso'ota'i | Bluetooth, USB, Type-C, AUX-IN, HDMI (1 port) |
| Galulue Vevela | -30°C i le 80°C |
| Gagana Lagolago | English, Chinese, Japanese, Portuguese, Russian, German, Spanish, Turkish, Italian, French, Polish, Hebrew, Slovenian |
Fa'amaonia ma Lagolago
Fa'amaonia: This CAMECHO product comes with a 2-year warranty from the date of purchase, covering manufacturing defects. Please retain your proof of purchase for warranty claims.
Lagolago Fa'atekinisi: For any technical assistance, questions, or issues not covered in this manual, please contact our customer support team. You can reach us via email at:

Image: A customer service representative ready to assist, symbolizing available support and user manual resources.