1. Folasaga
Fa'afetai mo le fa'atauasing the Lanix LX240 V7 23.8-inch Full HD Monitor. This manual provides essential information for the safe and efficient use of your new monitor. Please read it thoroughly before installation and keep it for future reference.
2. Fa'amatalaga Saogalemu
Mata'ituina le puipuiga o le saogalemu nei e puipuia ai le faaleagaina o le mata'itu ma mautinoa le saogalemu o tagata faaaoga:
- Do not expose the monitor to rain or moisture to avoid fire or electric shock.
- Aua le tatalaina le mata iasing. E leai ni vaega e mafai ona fa'aaogaina i totonu. Fa'asino uma auaunaga i tagata faigaluega agavaa.
- Tuu le mata'itu i luga o se mea mautu, mafolafola e puipuia ai mai le pau.
- Ia mautinoa le sa'o o le ea fa'ata'amilo i le mata'itū. Aua le poloka avanoa e savili ai.
- Fa'aaoga na'o le fa'aoga eletise o lo'o tu'uina atu ma le mata'itū.
- Disconnect the power plug from the outlet if the monitor will not be used for an extended period.
3. Mea i totonu o le afifi
Fa'amautinoa o lo'o iai mea uma ma o lo'o lelei pe a uma ona tatala:
- Lanix LX240 V7 Monitor
- Fetuunaiga Malosi
- Uaea HDMI
- Tusi Lesona a le Tagata (lenei pepa)

Image: Lanix LX240 V7 Monitor packaging box, showing the monitor model and key features.
4. Seti
4.1 Fa'apotopotoina o le Tulaga
Mulimuli i laasaga nei e fa'apipi'i ai le tulaga i lau mata'itū:
- Carefully remove the monitor from its packaging, keeping it protected.
- Attach the stand base to the stand neck. Secure with screws if provided.
- Fa'atulaga le tulaga ua uma ona fa'apipi'i ma le avanoa e fa'apipi'i ai i tua o le monitor.
- Gently push the stand into the slot until it clicks into place or secure with screws.

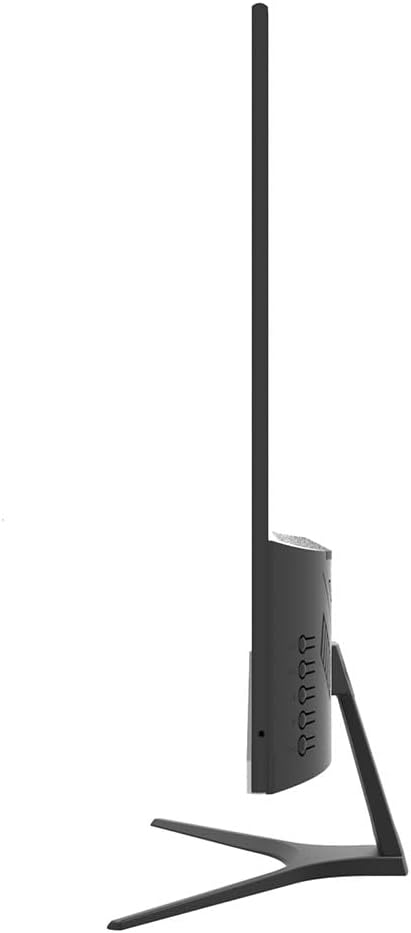
Ata: Tua view of the Lanix LX240 V7 monitor, showing the stand attachment point and port area.
4.2 Feso'ota'i le Matamata
Connect the monitor to your computer using the appropriate cables:
- So'oga Malosi: Connect the power adapter to the monitor's power input, then plug the adapter into a power outlet.
- Feso'ota'iga Vitio:
- HDMI: Fa'afeso'ota'i le tasi pito o le uaea HDMI i le uafu HDMI i lau mata'itū ma le isi pito i le uafu HDMI i lau komepiuta.
- VGA: Connect one end of the VGA cable to the VGA port on your monitor and the other end to the VGA port on your computer.
- Feso'ota'iga leo (pe a talafeagai): The monitor has integrated speakers. If using HDMI, audio will transmit automatically. For VGA, ensure your computer's audio output is configured correctly.
Ata: Itu view of the Lanix LX240 V7 monitor, illustrating the location of input ports and control buttons.
5. Fa'atonuga o Galuega
5.1 Fa'aola i luga/Pepe
Press the power button located on the monitor to turn it on or off. The power indicator light will illuminate when the monitor is on.
5.2 Filifiliga o Punaoa Ulufale
If you have multiple devices connected, you may need to manually select the input source:
- Press the "Input" or "Source" button on the monitor (refer to the side view image for button locations).
- Use the navigation buttons to select between HDMI and VGA inputs.
- Press the "Menu" or "OK" button to confirm your selection.
5.3 Fa'aaliga i luga ole Lau (OSD) Menu
The OSD menu allows you to adjust various monitor settings:
- Press the "Menu" button to open the OSD.
- Use the navigation buttons (usually up/down or left/right arrows) to browse through menu options such as Brightness, Contrast, Color Settings, Aspect Ratio, etc.
- Press "Menu" or "OK" again to enter a sub-menu or confirm a setting.
- Press the "Exit" or "Menu" button repeatedly to close the OSD.

Ata: Luma view of the Lanix LX240 V7 monitor, showcasing its display area and slim bezels.
6. Tausiga
Proper maintenance ensures the longevity of your monitor:
- Fa'amama le Mata: Solo lemu le lau i se ie vaivai e leai se liu. Mo faailoga maaa, oampi le ie fai sina vai po'o se fa'amama lau fa'apitoa. Aua ne'i sasaa sa'o le vai ile lau.
- Fa'amama le Casing: Fa'aaogā se ie mālū ma mago e solo ai le mata'itū iasing. Aloese mai mea fa'amama fa'amama po'o so'o.
- Teuina: Afai e teuina le mata'itu mo se vaitaimi umi, ia momotu uma uaea ma teu i se nofoaga malulu, matutu, e sili i lona uluai afifiina.
7. Faʻafitauli
Va'ai le laulau o lo'o i lalo mo fa'afitauli masani ma a latou fofo:
| Fa'afitauli | Mafuaaga e ono tupu | Fofo |
|---|---|---|
| Leai se ata i luga ole lau | Monitor not powered on; Incorrect input source; Loose video cable. | Ensure power cable is connected and monitor is turned on. Select correct input source (HDMI/VGA). Check video cable connections. |
| Pogisa tele/susulu tele le ata | E sese le fa'atulagaga o le pupula/eseesega. | Fetuuna'i tulaga o le Pupula ma le Fa'atusatusaga e ala i le lisi OSD. |
| Leai se leo mai sipika | Audio settings incorrect; Volume too low. | Check monitor's volume settings in OSD. Ensure computer's audio output is set to the monitor (for HDMI) or external speakers (for VGA). |
| Ata emoemo pe le mautu | Loose video cable; Incorrect refresh rate. | Ensure video cable is securely connected. Check your computer's display settings for the correct refresh rate (60Hz). |
8. Fa'amatalaga
| Igoa Fa'ata'ita'iga | LX240 V7 |
| Tele lau | 23.8 inches (23.6 inches actual) |
| Ituaiga Panel | LED |
| I'ugafono | 1920 x 1080 (Atoatoa HD) |
| Ituaiga Fa'atatau | 1.78:1 (16:9) |
| Fua Fa'afouina | 60 Hz |
| Taimi Tali | 5 Miliseconds |
| Malamalama | 250 cd/m² |
| Fa'atusatusaga Fa'atusatusa | 3000:1 |
| Viewi le Angle | 178 Tikeri |
| Feso'ota'i | 1x HDMI, 1x VGA |
| Fofoga Fetalai | Ioe |
| Fa'aaogāga Malosiaga | 22 Watts |
| Fua (H x W x D) | Approx. 21cm x 25cm x 5cm (screen only, based on image) |
| mamafa | 2.71 kilokalama |
Ata: Luma view of the Lanix LX240 V7 monitor with height, width, and depth measurements indicated.
9. Tuutuuga & Lagolago
Fa'amatalaga Fa'amaonia: The Lanix LX240 V7 monitor comes with a 1-year manufacturer's warranty. This warranty covers defects in materials and workmanship under normal use. It does not cover damage caused by misuse, accidents, unauthorized modifications, or external causes.
Lagolago tagata fa'atau: For technical assistance, warranty claims, or service inquiries, please contact Lanix customer support. Refer to the official Lanix webnofoaga po'o lau fa'atauga fa'amaumauga mo fa'amatalaga fa'afeso'ota'i.