Folasaga
This manual provides detailed instructions for the safe and efficient operation of your SINGER M1005 Electric Sewing Machine. The M1005 is designed for various sewing projects, offering 4 built-in stitches with 11 options, adjustable thread tension, and a reverse lever for securing seams. Please read this manual thoroughly before using the machine to ensure proper setup and function.
Fa'atonuga Taua mo le Saogalemu
Pe a fa'aogaina se mea fa'aeletise, e tatau ona mulimulita'ia puipuiga fa'avae mo le saogalemu, e aofia ai mea nei:
- Faitau uma faʻatonuga aʻo leʻi faʻaaogaina lenei masini suʻisuʻi.
- Keep these instructions in a convenient place near your machine.
- Always unplug the machine from the electrical outlet immediately after using and before cleaning, removing covers, lubricating, or making any other user servicing adjustments mentioned in the instruction manual.
- Aua le fa'atagaina e fa'aaogaina e fai ma meata'alo. E mana'omia le va'ava'ai toto'a pe a fa'aogaina lenei masini e tamaiti pe latalata ane.
- Fa'aaoga lenei oloa mo lona fa'amoemoe e fa'aaoga e pei ona fa'amatalaina i lenei tusi lesona.
- Never operate this sewing machine if it has a damaged cord or plug, if it is not working properly, or if it has been dropped or damaged.
- Taofi ese tamailima mai vaega minoi uma. E manaʻomia se tausiga faʻapitoa i le nila nila suʻisuʻi.
- Fa'aaoga i taimi uma le ipu nila nila. O le sese o ipu e mafai ona gau ai le nila.
- Aua le toso pe tulei le ie a'o e su'i. E ono see ese ai le nila ma gau ai.
- Tape le masini su'isu'i pe a faia ni fetuunaiga i le vaega o le nila, e pei o le fa'aofiina o le filo i le nila, sui le nila, fa'aofiina o le bobbin, po'o le sui o le vae o le lomi.
Ua Umaview
The SINGER M1005 is a compact and user-friendly electric sewing machine designed for ease of use and portability.
Vaega Autu:
- 4 Stitches in 11 Options: Select from various straight stitches, zigzag stitches, blind hem stitch, and multi-stitch zigzag using the Stitch Selector Dial.
- Adjustable Thread Tension: Allows for fine-tuning stitch quality for different fabrics and threads.
- Luga Fa'aulu i totonu Bobbin: Features a transparent bobbin cover for easy monitoring of thread supply and simple bobbin insertion.
- Free-Arm Design: Facilitates sewing of cylindrical items like trouser hems and sleeve cuffs.
- Reverse Lever: Conveniently located for securing the beginning and end of seams with reverse stitches.
- Extra High-Presser Foot Lifter: Provides additional clearance for sewing multiple layers or thicker fabrics.
- Fuafuaga feaveai: Lightweight for easy transport and storage.
Vaega e aofia ai:
Your SINGER M1005 sewing machine package includes the following items:
- 1 Masini Su'isu'i
- All-purpose Foot
- Extra Needle
- Finger Guard (pre-installed, removable)
- Bobbins: Class 15 (Transparent)
- Manu'a Mea Fa'a'ala'au
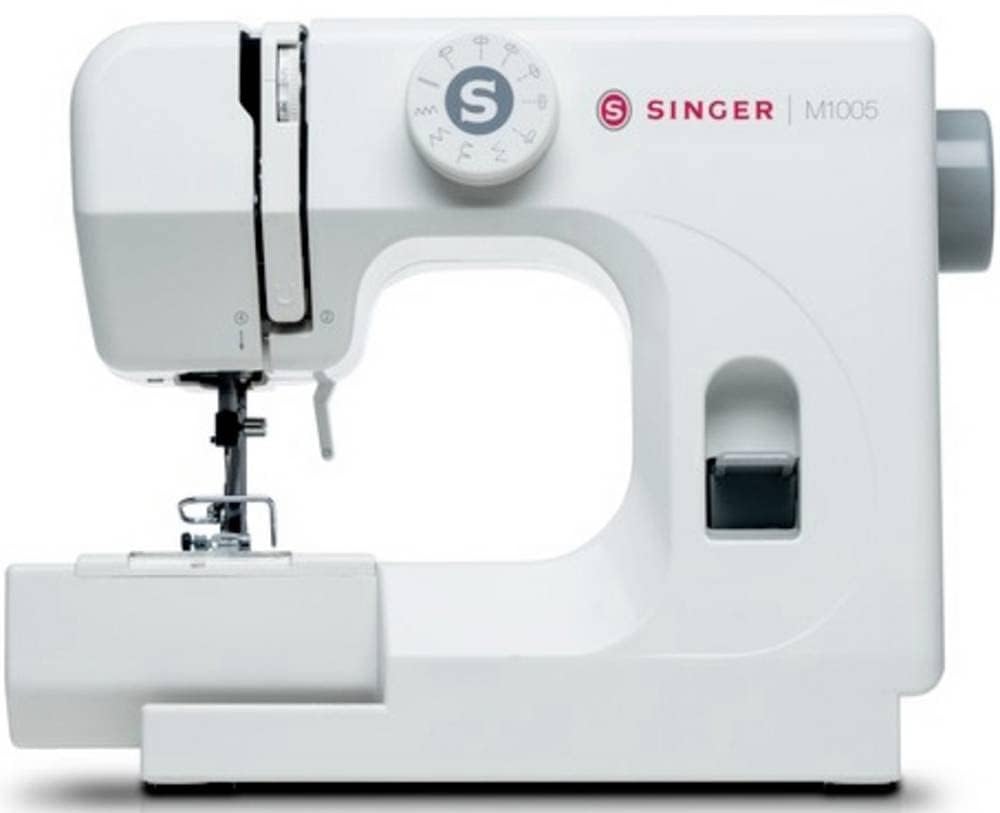
Ata 1: The SINGER M1005 Electric Sewing Machine, showcasing its compact design and ready-to-use setup.
Seti
1. So'oga Malosi
- Tuu le masini i luga o se fale mautu, mafolafola.
- Ia mautinoa o lo'o i ai le ki o le eletise i le tulaga "OFF".
- Connect the power cord to the machine's power input and then to a suitable electrical outlet.
2. Winding the Bobbin
Proper bobbin winding ensures smooth stitching.
- Tuu se filo filo i luga o le pine fa'aili.
- Guide the thread through the upper thread guide and around the bobbin winding tension disc.
- Insert the thread through the small hole in the bobbin from the inside out.
- Place the bobbin onto the bobbin winder spindle.
- Oomi le mea fa'apipi'i vili i le itu taumatau.
- Turn on the machine and gently press the foot controller (if applicable) or press the start button to begin winding.
- Once the bobbin is full, push the spindle back to the left and cut the thread.
3. Inserting the Top Drop-in Bobbin
The transparent bobbin cover allows for easy monitoring.
- Ensure the needle is in its highest position.
- Open the transparent bobbin cover plate.
- Place the wound bobbin into the bobbin case with the thread unwinding counter-clockwise.
- Ta'ita'i le filo i totonu o le spring fa'afefeteina ona sosoo ai lea ma le avanoa e fa'aaoga ai le ta'iala filo.
- Pull out approximately 10-15 cm (4-6 inches) of thread.
- Toe sui le ipu fa'apipi'i.
4. Threading the Upper Thread
Correct upper threading is crucial for proper stitch formation.
- Sii i luga le vae masini lolomi.
- Tuu se filo filo i luga o le pine fa'aili.
- Ta'ita'i le filo i le ta'iala filo pito i luga.
- Follow the numbered threading path down the right channel, up the left channel, and through the take-up lever from right to left.
- Continue guiding the thread down to the needle bar thread guide.
- Fa'asolo le nila mai luma i tua.
- Pull approximately 15-20 cm (6-8 inches) of thread through the needle eye.
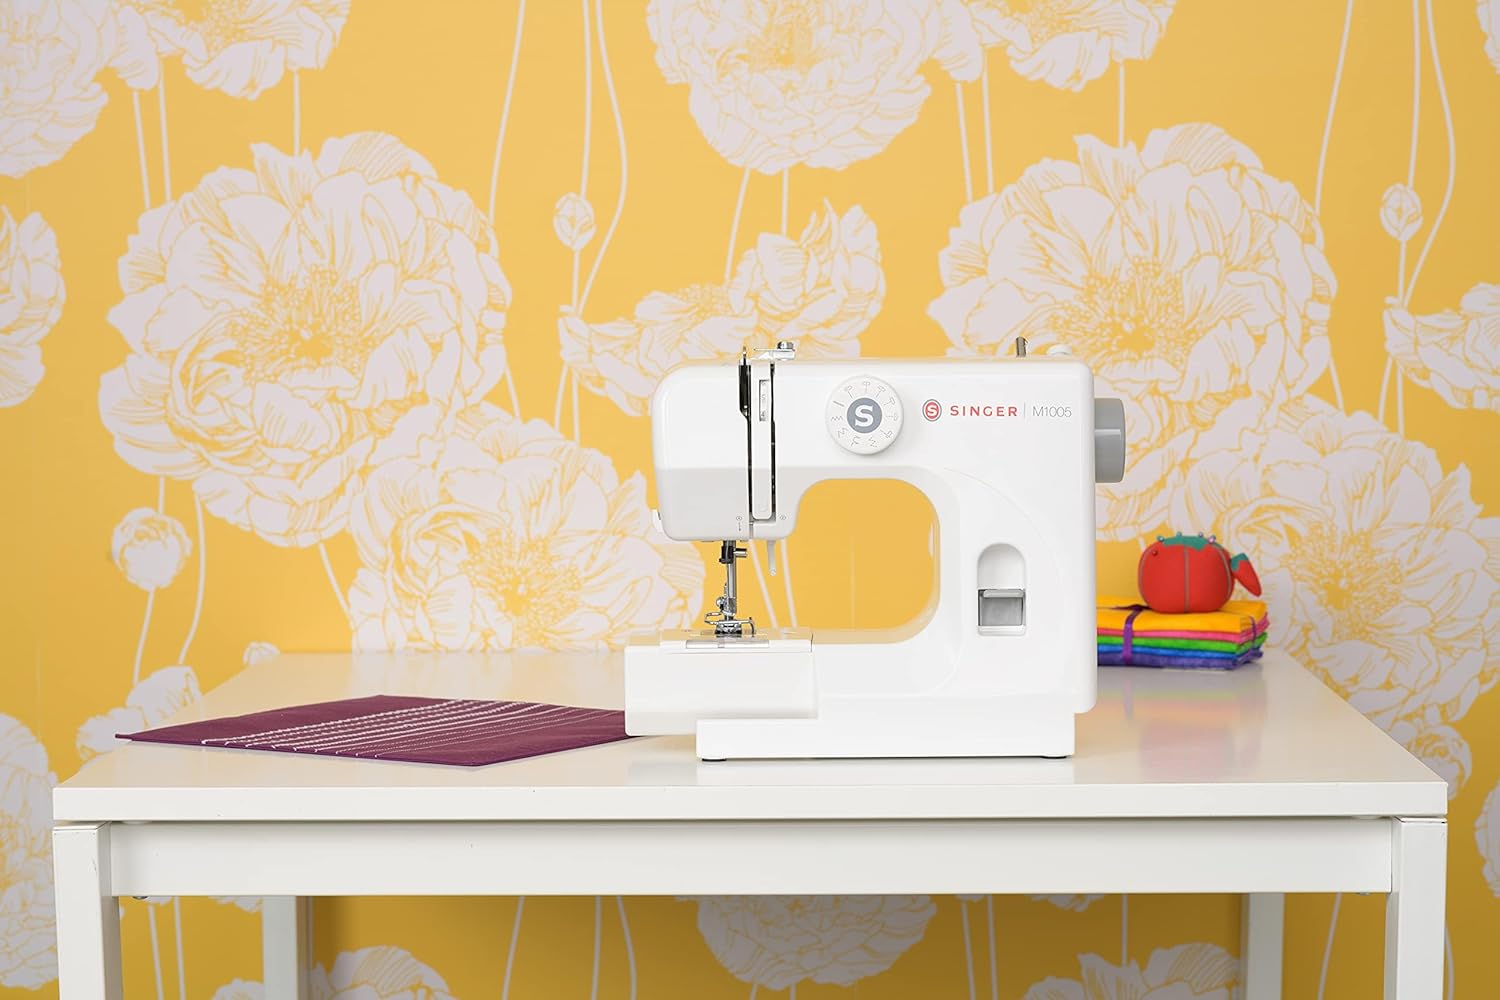
Ata 2: Luma view of the SINGER M1005, highlighting the stitch selector dial and general threading area.
Fa'atonuga o Galuega
1. Selecting a Stitch
The SINGER M1005 offers 4 core stitch types with 11 different options.
- Liliu le Su'i Filifilia Dial to choose your desired stitch pattern.
- Available stitches include various straight stitches (different lengths/positions), three types of zigzag stitches (different lengths/widths), one blind hem stitch, and one multi-stitch zigzag.
- The optimum stitch width for this machine is 4 mm.
2. Adjusting Thread Tension
Adjust the needle thread tension to achieve balanced stitches.
- The tension dial is usually located on the front of the machine.
- Turn the dial to a higher number for tighter tension, and a lower number for looser tension.
- Test on a scrap piece of fabric to find the ideal setting for your fabric and thread combination.
3. Using the Reverse Lever
The reverse lever is used to secure the beginning and end of seams.
- To sew in reverse, press and hold the Lever Fa'asaga located on the front of the machine.
- Release the lever to resume forward stitching.
4. Free-Arm Sewing
To utilize the free-arm feature for sewing cuffs, pant hems, or other small circular items:
- Remove the accessory storage compartment (if present) by sliding it off to the left.
- The narrow free arm is now exposed, allowing you to slide fabric around it.
5. Extra High-Presser Foot Lifter
For thicker fabrics or multiple layers, the presser foot can be raised higher than its standard position.
- Lift the presser foot lifter to its highest position.
- For extra clearance, push the lifter up further to engage the extra high position.
Tausiga
Regular maintenance ensures the longevity and optimal performance of your sewing machine. Always unplug the machine before performing any maintenance.
1. Fa'amama le Masini
- Ave'esea Line: Use a small brush to remove lint and dust from the bobbin area and feed dogs.
- Fa'amamaina i fafo: Solo le pito i fafo i se mea vaivai, oamp ie. Aua le fa'aaogaina vaila'au malolosi.
2. Suiga o nila
Replace the needle regularly (after 8-10 hours of sewing) or if it becomes bent, dull, or broken.
- Tape le masini ma tatala le palaka.
- Faʻamama le nilaamp faovilivili
- Aveese le nila tuai.
- Fa'aofi se nila fou ma fa'asaga le itu mafolafola i tua o le masini, ma tulei i luga i le mamao e mafai ai.
- Fa'amau le nila clamp vili fa'amaumau.
Fa'afitauli
Tagai i le vaega lenei mo ni tali i faʻafitauli masani e te ono feagai.
| Fa'afitauli | Mafuaaga e ono tupu | Fofo |
|---|---|---|
| Fa'ase'e Su'i | Incorrect needle, bent needle, improper threading. | Replace needle with correct type/size, re-thread machine correctly. |
| Gagana filo | Incorrect threading, tension too tight, damaged needle, poor quality thread. | Toe fa'apipi'i le masini i filo, fetu'una'i le mamafa, sui le nila, fa'aaoga filo lelei. |
| Fe'ei o Ie | Tension too tight, incorrect stitch length, wrong needle for fabric. | Loosen tension, adjust stitch length, use appropriate needle. |
| Fa'asaoina o masini | O lo'o lavelave le filo i le vaega o le pa'u, fa'aputu le lint, le sa'o o le fa'aofiina o le pape. | Remove bobbin and clean bobbin case, re-insert bobbin correctly. |
| Su'i le tutusa | Incorrect thread tension, improper threading, worn needle. | Adjust tension, re-thread machine, replace needle. |
Fa'amatalaga
Technical specifications for the SINGER M1005 Electric Sewing Machine.
- Fa'ailoga: PESE
- Numera Fa'ata'ita'i: M1005 (Part Number: 230246102)
- Lanu: Lanu pa'epa'e
- Mea: palasitika
- Mea mamafa: 3 kilokalama
- Punavai Malosi: Uaea Eletise
- Stitch Options: 4 built-in stitches with 11 options
- Max Stitch Width: 4 mm
- Ituaiga Bobbin: Class 15 (Transparent, Top Drop-in)
- Mea Fa'apitoa: Adjustable Thread Tension, Free-Arm Design, Reverse Lever, Extra High-Presser Foot Lifter
Fa'amaonia ma Lagolago
For warranty information, service, or technical support, please refer to the warranty card included with your product or contact SINGER customer service directly. Keep your purchase receipt as proof of purchase.
You can typically find contact information for SINGER support on their official webnofoaga po'o totonu o le afifiina o oloa.