
1. Folasaga
Fa'afetai mo le fa'atauasing the DACOM GF7 TWS V4.2 Bluetooth Earbuds. This manual provides detailed instructions on how to set up, operate, and maintain your earbuds to ensure optimal performance and longevity. Please read this manual thoroughly before using the product and retain it for future reference.
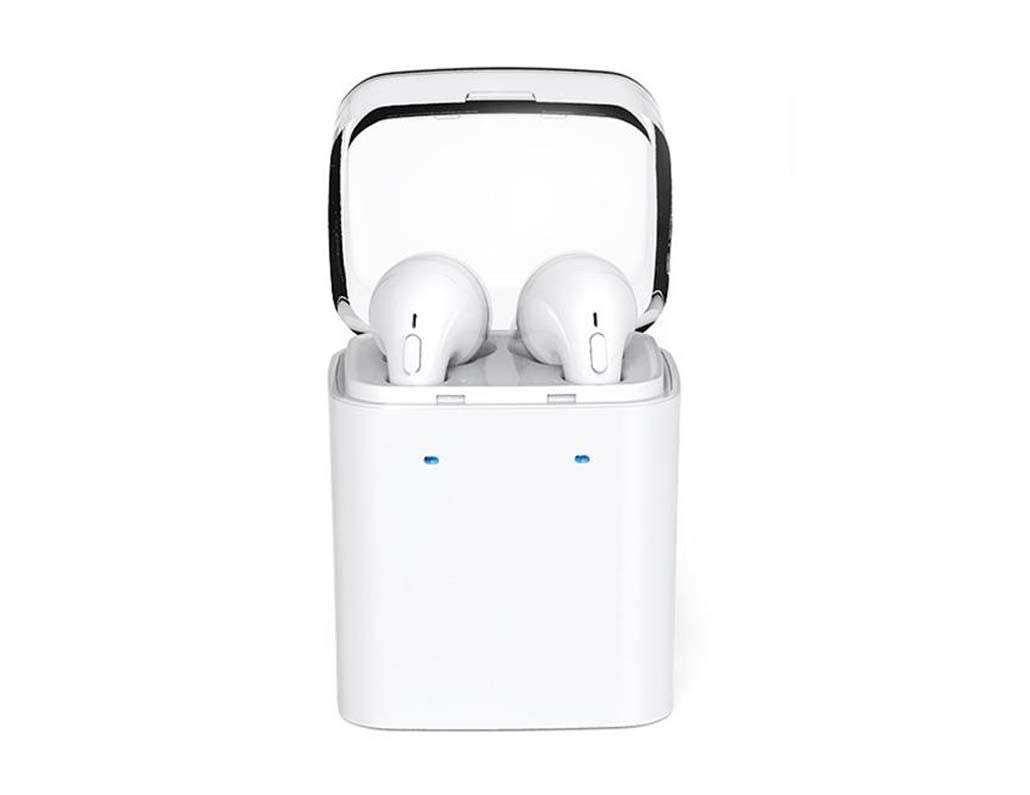
Image 1.1: DACOM GF7 TWS V4.2 Bluetooth Earbuds in their charging case.
2. Mea i totonu o le afifi
Fa'amolemole siaki mea o lo'o i totonu o le afifi pe a tatala le pusa. Afai o iai ni mea e misi pe fa'aleagaina, fa'afeso'ota'i lau fa'atau oloa.
- DACOM GF7 TWS V4.2 Bluetooth Earbuds (Left and Right)
- Pusa feaveai uta
- USB Totogi Uaea
- Aluga taliga (tusa eseese)
- Tusi Lesona a le Tagata (lenei pepa)
3. Oloa Ua Ovaview
Familiarize yourself with the components of your DACOM GF7 TWS V4.2 Earbuds and charging case.

Image 3.1: Detailed diagram showing the Multifunction Button (MFB), Indicator Light, Microphone (Mic), Air Gate, DC5V Charge Jack Cover, Headphone Charging Indicator Light, USB Charging Input Port, and the Charging Indicator Light of the bottom on the DACOM GF7 TWS V4.2 Earbuds and Charging Case.
- Ki tele galuega (MFB): Used for power, playback, call management, and voice assistant activation.
- Fa'ailoga moli: Displays pairing status, charging status, and power status.
- Mika: Built-in microphone for calls and voice commands.
- Faitotoa Ea: Acoustic vent for sound performance.
- DC5V Charge Jack Cover: Protects the charging port on the earbuds.
- Headphone Charging Indicator Light: Shows charging status of individual earbuds within the case.
- USB Charging Input Port: For charging the portable charging case.
- Charging Indicator Light of the bottom: Shows charging status of the case.
4. Seti
4.1. Charging the Earbuds and Charging Case
- Totogiina le Case: Connect the USB charging cable to the USB Charging Input Port on the charging case and the other end to a 5V USB power adapter (not included). The Charging Indicator Light at the bottom of the case will illuminate to indicate charging. Once fully charged, the indicator light may change color or turn off.
- Totogiina le Earbuds: Place the earbuds into their respective slots in the charging case. Ensure the earbuds are properly seated. The Headphone Charging Indicator Light on the case will show the charging status of the earbuds. The earbuds' indicator lights will also show charging status (e.g., red while charging, off when fully charged).
- For first-time use, fully charge both the earbuds and the charging case.
4.2. Paʻaga Bluetooth
- Malosiaga: Take both earbuds out of the charging case. They will automatically power on and attempt to pair with each other. You will hear an audible prompt indicating they are connected to each other.
- Faʻatasi faʻaluaina: Once the earbuds are paired with each other, one earbud's indicator light will flash red and blue alternately, indicating it is in pairing mode and ready to connect to your device.
- Feso'ota'i i le masini: On your smartphone or Bluetooth-enabled device, go to the Bluetooth settings and search for available devices. Select "DACOM GF7 TWS" (or similar name) from the list.
- Manuia So'oga: Once connected, the earbud's indicator light will stop flashing, and you will hear a confirmation sound.
- Toe So'oga otometi: After initial pairing, the earbuds will automatically connect to the last paired device when taken out of the charging case, provided Bluetooth is enabled on your device.
5. Fa'atonuga o Galuega
The DACOM GF7 TWS V4.2 Earbuds feature a Multifunction Button (MFB) for various controls.
5.1. Malosi / Malosi
- Malosiaga: Take the earbuds out of the charging case. They will power on automatically. Alternatively, press and hold the MFB on both earbuds for approximately 3 seconds until you hear a power-on prompt.
- Tapē le eletise: Place the earbuds back into the charging case. They will power off automatically. Alternatively, press and hold the MFB on both earbuds for approximately 5 seconds until you hear a power-off prompt.
5.2. Toe Tataina Musika
- Ta'alo/Taofi: Single press the MFB on either earbud.
- Su'ega Sosoo: Double press the MFB on the right earbud.
- Ala na muamua atu: Double press the MFB on the left earbud.
5.3. Valaau Pulega
- Tali/Fa'ai'u le Valaau: Single press the MFB on either earbud.
- Te'ena Valaau: Press and hold the MFB on either earbud for approximately 2 seconds.
5.4. Fesoasoani leo
- Faʻaola le Leo Fesoasoani: Triple press the MFB on either earbud to activate your device's voice assistant (e.g., Siri, Google Assistant).
5.5. Faalēaogā Pisa
- The DACOM GF7 TWS V4.2 features active noise cancellation. Specific activation methods may vary. Refer to the product's quick start guide or manufacturer's website for precise instructions if not detailed here. Typically, a long press or specific tap sequence on an MFB or dedicated button activates/deactivates ANC.
6. Tausiga
O le tausiga lelei e mautinoa ai le umi o le ola ma le faʻatinoga o au taliga.
- Fa'amamaina: Fa'amama e le aunoa le taliga ma le pusa fa'atumu i se ie vaivai, mago, leai se lint. Aua ne'i fa'aogaina vaila'au malolosi po'o mea fa'afefete.
- Fautuaga taliga: Aveese ma fa'amamā pito taliga i lea taimi ma lea taimi i le fa'aaogaina o le adamp ie ma le fasimoli mālū, ona fufulu lea ma fa'amago lelei a'o le'i toe fa'apipi'i.
- Teuina: A le fa'aogaina, teu fa'alogo taliga i totonu o le pusa fa'atumu e puipui ai mai le pefu ma fa'aleagaina.
- Aloese mai le susu: Taofi ese le earbuds ma le pusa e fa'atumu ai le telefoni mai le vai, le susū tele, ma le vevela tele.
7. Faʻafitauli
If you encounter issues with your earbuds, refer to the following common problems and solutions.
| Fa'afitauli | Fofo |
|---|---|
| E le fetaui lelei taliga (earbuds). |
|
| Earbuds not connecting to device. |
|
| Leai se leo mai taliga taliga. |
|
| Charging case or earbuds not charging. |
|
8. Fa'amatalaga
| Igoa Fa'ailoga | DACOM |
| Igoa Fa'ata'ita'iga | GF7 TWS |
| Numera Fa'ata'ita'i | 7TWS |
| Lanu | Lanu pa'epa'e |
| Fa'atupu Fa'auluuluga | I-Taliga |
| Pulea Pisa | Fa'aleaogaina Pisa |
| Tekinolosi Feso'ota'i | Uaealesi (Bluetooth) |
| Tekonolosi Feso'ota'iga uaealesi | Bluetooth V4.2 (inferred from title) |
| Fa'aaofia Vaega | Talitaliga |
| Fa'apitoa Fa'apitoa | Noise Cancellation, Microphone Included |
| Metotia Pulea | Pa'i |
| Masini Fegalegaleai | O masini uma |
| Mea | PU Metal Eraser (likely referring to ear tip material or casing finish) |
9. Fa'amatalaga Saogalemu
Please read and follow these safety guidelines to prevent injury or damage to your device.
- Do not disassemble, repair, or modify the product. This may cause fire, electric shock, or complete damage to the product.
- Keep the product away from extreme temperatures (hot or cold), direct sunlight, and sources of heat.
- Aloese mai le tu'uina atu o le oloa ile vai po'o isi vai.
- Aua ne'i fa'aogaina le oloa i le maualuga o le leo mo ni vaitaimi umi e puipuia ai le fa'aleagaina o le fa'alogo.
- Fa'aaoga na'o uaea ua saunia pe fautuaina ma mea fa'apipi'i.
- Taofi ese mai tamaiti ma fagafao. O vaega laiti e ono tula'i mai ai se lamatiaga e laoa ai.
- Be aware of your surroundings when using the earbuds, especially in traffic or other potentially dangerous situations.
10. Fa'amaonia ma Lagolago
DACOM products are designed and manufactured to the highest quality standards. For detailed warranty information, please refer to the warranty card included with your purchase or visit the official DACOM webnofoaga.
For technical support, troubleshooting assistance, or to inquire about replacement parts, please contact DACOM customer service through their official webnofoaga po'o fa'amatalaga fa'afeso'ota'i o lo'o tu'uina atu i lau afifiina o oloa.
- Lagolago i luga ole laiga: Visit the official DACOM web'upega tafaʻilagi mo Fesili Masani (FAQs), tusiga lagolago, ma fomu faʻafesoʻotaʻi.
- Fesoasoani ile imeli: Refer to your product packaging for customer service email addresses.