
1. Oloa Ua Ovaview
The DJI Mini 4 Pro is a compact and advanced camera drone designed for aerial photography and videography. Weighing under 249 grams, it offers enhanced portability and often requires no registration in many regions (always check local regulations). This drone is equipped with a high-resolution camera, intelligent flight features, and robust obstacle sensing capabilities.
The Fly More Combo includes additional accessories to extend flight time and enhance the user experience.
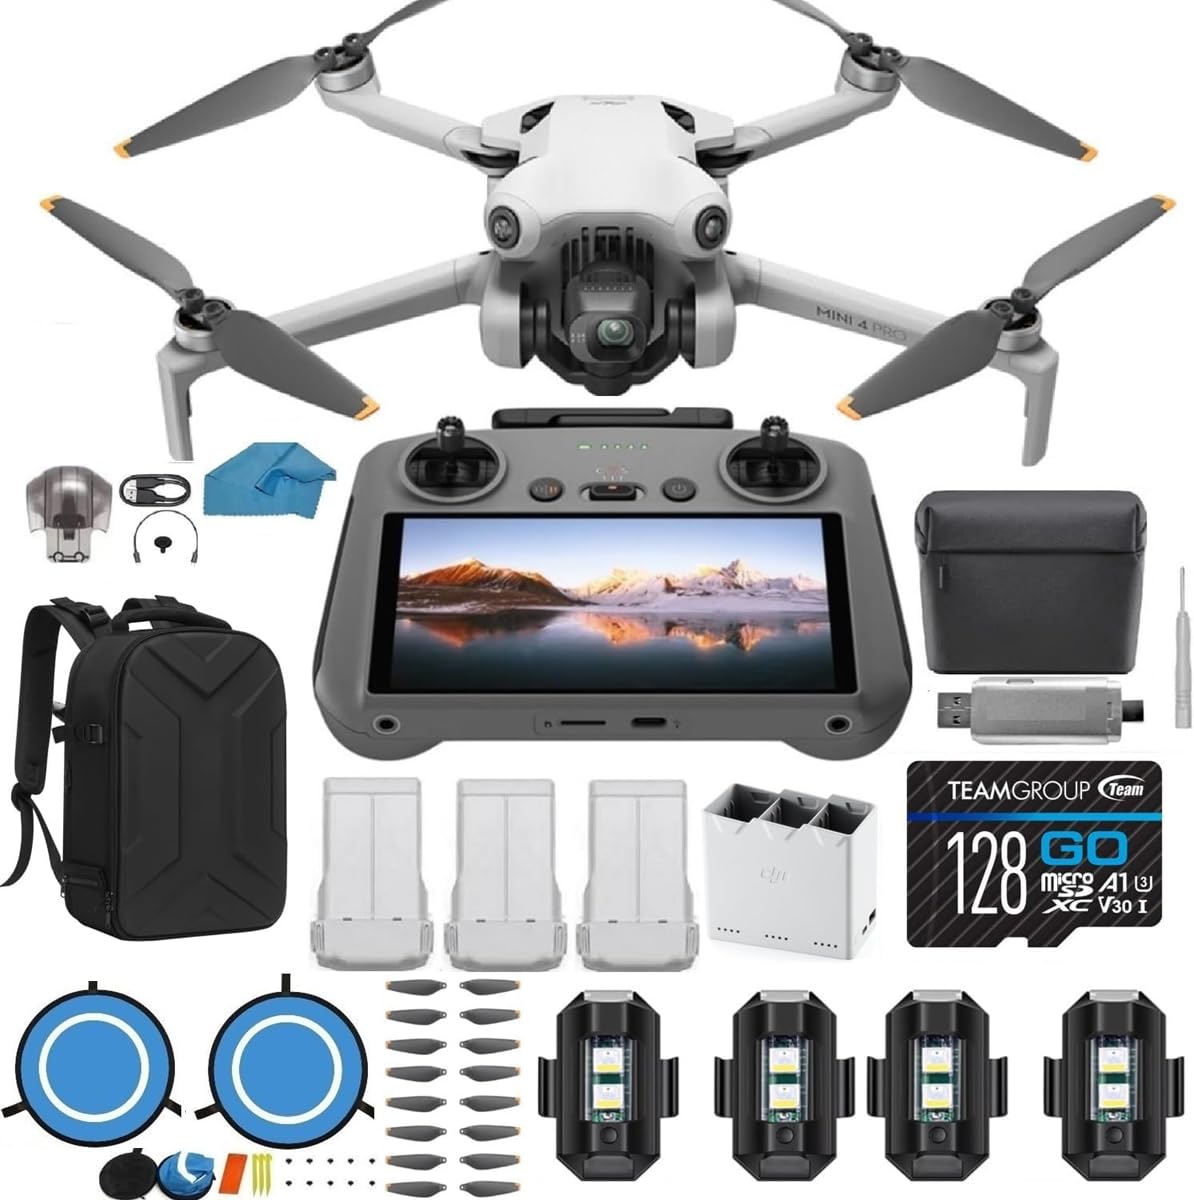
Figure 1: DJI Mini 4 Pro Drone and DJI RC 2 Remote Controller.

Figure 2: The DJI Mini 4 Pro Drone in its compact, folded state.
2. Seti Taiala
2.1 Ta'ese'ese ma Su'esu'ega Muamua
Carefully remove all components from the packaging. Verify that all items listed in your Fly More Combo are present:
- DJI Mini 4 Pro Drone (with DJI RC 2 Remote Controller)
- 3x DJI Intelligent Flight Batteries
- 1x Two-way Charging Hub
- 1x Shoulder Bag
- 2 Pairs (10 pieces) of Propellers
- 1x Gimbal Holder
- Uaea ma Fetuunaiga
- Quick Start Manuals
- 1x 128GB SD Card
- 1x USB 3.0 SD Card Reader
- 1x Micro Fiber Cleaning Cloth
- 1x mataupu
- 1x Landing Pad
- 1x Fa'avili
- 6x Siu
- 4x Strobe Lights
2.2 Totogiina maa
Before first use, fully charge all Intelligent Flight Batteries using the provided Two-way Charging Hub and appropriate power adapter. The charging hub allows for sequential charging of multiple batteries.
2.3 Saunia le Drone
- Unfold the drone arms. The front arms unfold first, followed by the rear arms.
- Aveese le puipui gimbal.
- Insert a charged Intelligent Flight Battery into the drone until it clicks securely into place.
- Insert the 128GB SD card into the drone's SD card slot.
2.4 Remote Controller Preparation
Ensure the DJI RC 2 remote controller is fully charged. Attach the control sticks by screwing them into the designated ports on the controller.
3. Fa'atonuga o Galuega
3.1 Fa'aola i luga/Pepe
- To power on: Press the power button once, then press and hold it for two seconds.
- To power off: Repeat the power-on sequence.
3.2 Fa'agaioiga Fa'avae o Va'alele
After powering on the drone and remote controller, ensure they are linked. The DJI RC 2's built-in screen will display the camera view and flight information. Always ensure sufficient GPS signal before taking off.
- Aveese mai: Place the drone on a flat, open surface. Use the auto take-off function via the remote controller or manually push both control sticks down and outwards to start the motors, then push the left stick up to ascend.
- Tulaueleele: Use the auto-landing function or slowly pull the left stick down to descend. Hold the stick down for a few seconds after landing to stop the motors.
- Puleaina o Vaalele: Use the left stick to control altitude and rotation (yaw). Use the right stick to control forward/backward (pitch) and left/right (roll) movement.
3.3 Vaega Atamai

Figure 3: Omnidirectional Obstacle Sensing in action, providing enhanced flight safety.
- Lagona o Fa'alavelave i Itu Uma: The drone features sensors in all directions to detect and avoid obstacles, enhancing flight safety.
- ActiveTrack 360°: This feature allows the drone to automatically track a subject from various angles, providing dynamic footage.
- Advanced RTH (Return-to-Home): The drone can automatically return to its take-off point when the battery is low or connection is lost, navigating obstacles along the way.

Figure 4: Key features of the DJI Mini 4 Pro, including extended flight time and advanced tracking.
3.4 Fa'atinoga o meapueata

Figure 5: High-quality imaging features of the DJI Mini 4 Pro.
- Pu'eina Vitio: The drone supports 4K/60fps HDR video recording, and 4K/100fps for slow-motion effects.
- Pu'e Ata: Capture still images at 48 MP resolution, including RAW format for professional editing.
- Pu'aiga Tu'usa'o Moni: The gimbal can rotate to allow for native vertical video capture, ideal for social media platforms.
- Pulea Gimbal: Use the remote controller's dedicated dial to adjust the camera's tilt angle during flight.
4. Tausiga
4.1 Suiga Fa'asolo
Regularly inspect propellers for any signs of damage (cracks, bends, chips). Replace damaged propellers immediately using the spare propellers and screwdriver provided in the kit. Ensure correct propeller types are installed on the corresponding motor arms (indicated by markings).
4.2 Tausiga maa
- Always use official DJI charging equipment.
- Aua ne'i ova le fa'amuina po'o le fa'amama maa.
- Teu maa i se nofoaga malulu, matutu mamao ese mai le susulu o le la.
- Afai e teuina mo se taimi umi, fa'amama le malosi o maa i le pe tusa ma le 50-60%.
4.3 Fa'amamāina
Use the microfiber cleaning cloth to gently wipe the drone's body, camera lens, and sensors. Avoid using harsh chemicals or abrasive materials.
5. Faʻafitauli
5.1 Mataupu masani ma Fofo
- E le o fa'agaoioia le drone: Ensure the battery is fully charged and correctly inserted. Perform the power-on sequence (press once, then press and hold).
- Loss of signal: Fly within the recommended range (up to 4.3 miles). Ensure no major obstructions are between the remote controller and the drone.
- Unstable flight: Check propellers for damage and replace if necessary. Ensure flight is conducted in calm weather conditions, as strong winds can affect stability.
- Le lelei ata/vitio: Clean the camera lens with the microfiber cloth. Ensure adequate lighting conditions. Adjust camera settings as needed.
- Obstacle avoidance not working: Ensure obstacle sensing is enabled in the app settings. Fly at appropriate speeds in complex environments.
5.2 Manatu Tāua
- Tulafono Fa'alotoifale: Always check and comply with local drone flight regulations and laws before operating the drone.
- A'oa'oga Pipi: Familiarize yourself with the drone's controls and features in a safe, open environment before attempting complex maneuvers.
6. Fa'amatalaga
| Fa'ailoga | DJI |
| Igoa Fa'ata'ita'iga | Mini 4 Pro |
| Mea mamafa | 3 pauna (pe tusa 1.36 kilokalama) |
| I'uga o Pu'e Vitio | 4K |
| I'uga lelei pea | 12 MP (up to 48 MP RAW) |
| Tekinolosi Feso'ota'i | Wi-Fi |
| Ma'a Cell Fa'atulagaina | Lithium Ion |
| Avanoa aupito maualuga | 4.3 Miles (approx. 6.9 km) |
| Ituaiga Pulea | Pulea Mamao |
| Mea | palasitika |
| Galulue Vevela | 14 Degrees Fahrenheit (-10°C) |
7. Fa'amaonia ma Lagolago
7.1 Fa'amatalaga Fa'amaonia
The DJI Mini 4 Pro Drone typically comes with a 1-year manufacturer's warranty. Please refer to the official DJI warranty policy for detailed terms and conditions.
7.2 Fesoasoani mo Tagata Fa'atau
For technical assistance, troubleshooting beyond this manual, or warranty claims, please contact DJI customer support directly. If purchased from a third-party seller, such as Koozam - Same Day Shipping, you may also reach out to them for initial support, though their primary contact method may be email only.